All Colonist Bunker Locations & Routes
Complete guide to all 6 colonist bunkers in Subnautica 2 — each with a Modification Bed to expand inventory and quick slots.
There are 6 colonist bunkers scattered across the shallow waters. Each contains a Modification Bed that permanently expands your inventory or quick toolbar.
For the full story walkthrough including these bunkers, see the Complete Story Walkthrough.
1. Bunker - Anita’s Garden
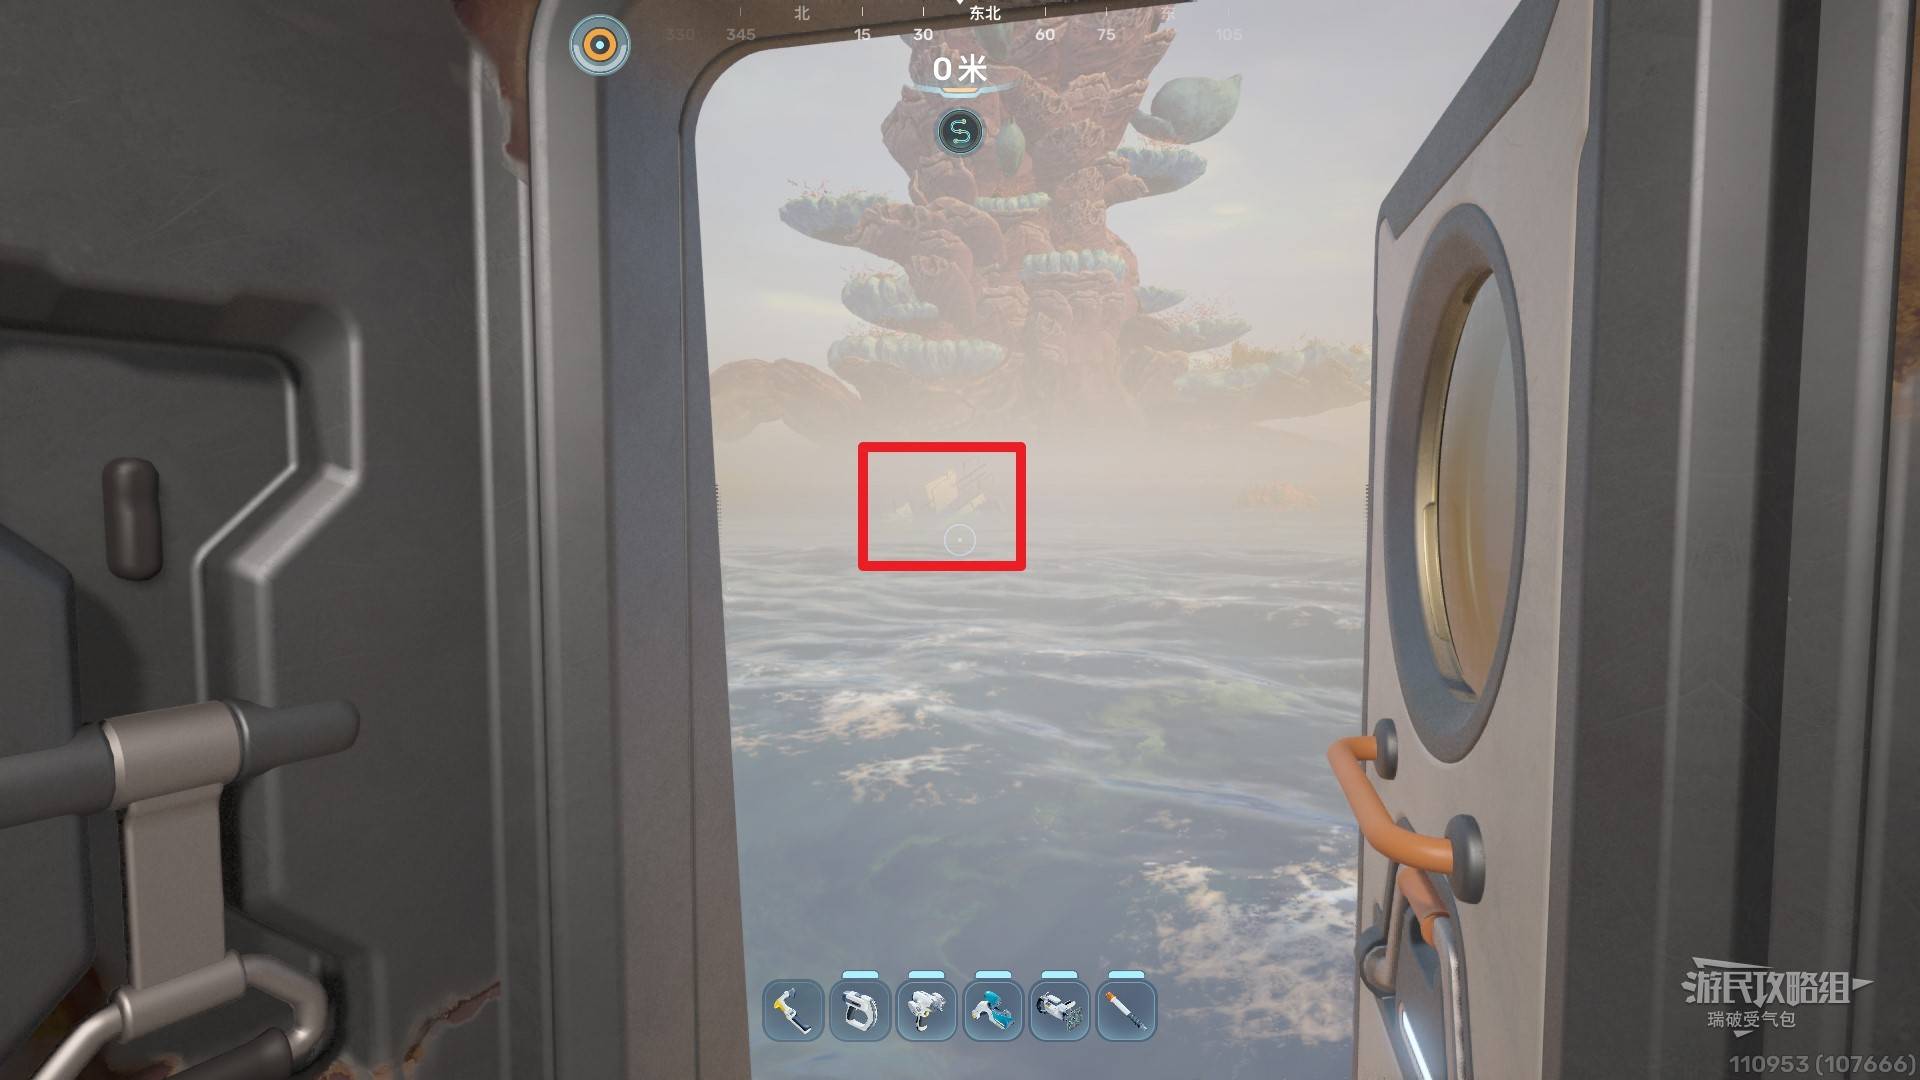
Route: From the lifepod, head NE 45 about 90m. Find metal wreckage above water. Next to it, a cave with a strong downward current — ride it to the bottom. Bubble plants on the left for oxygen. At the table, scan Underwater Propeller Module 1/3 and Flashlight 2/3. Look NE for a blue-lit cave. Follow the tunnel, keep right at the fork.
Inside: Scan Stool, Trash Can, Single Bed, Bio Bed. Download data from the trash can. Use the Bio Bed for an endurance boost.
2. Bunker - Salvage
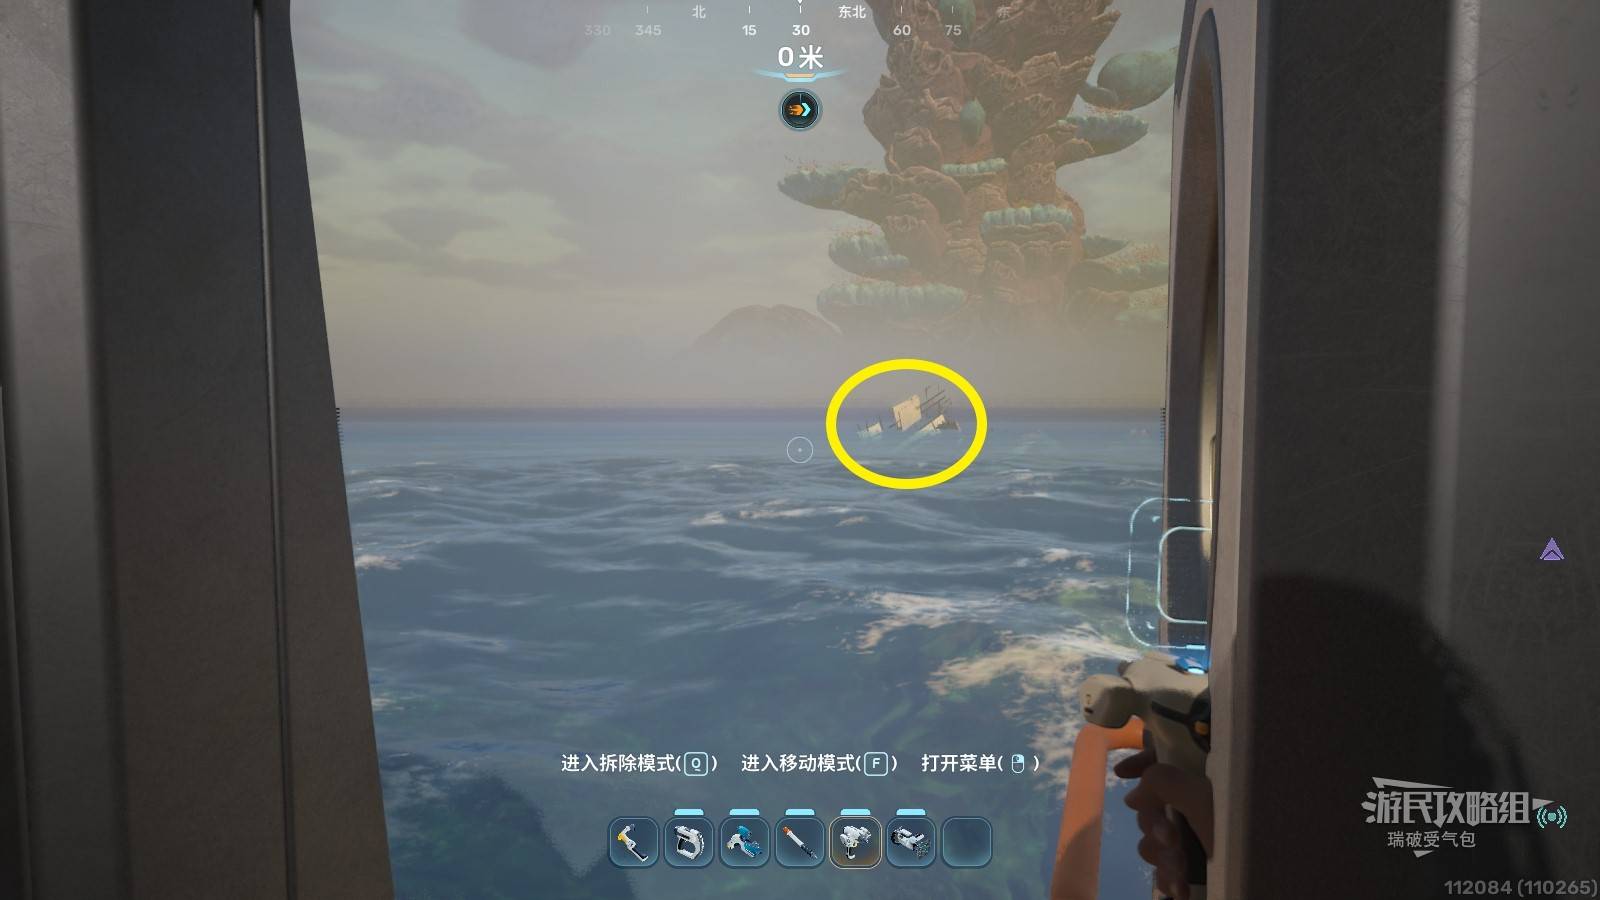
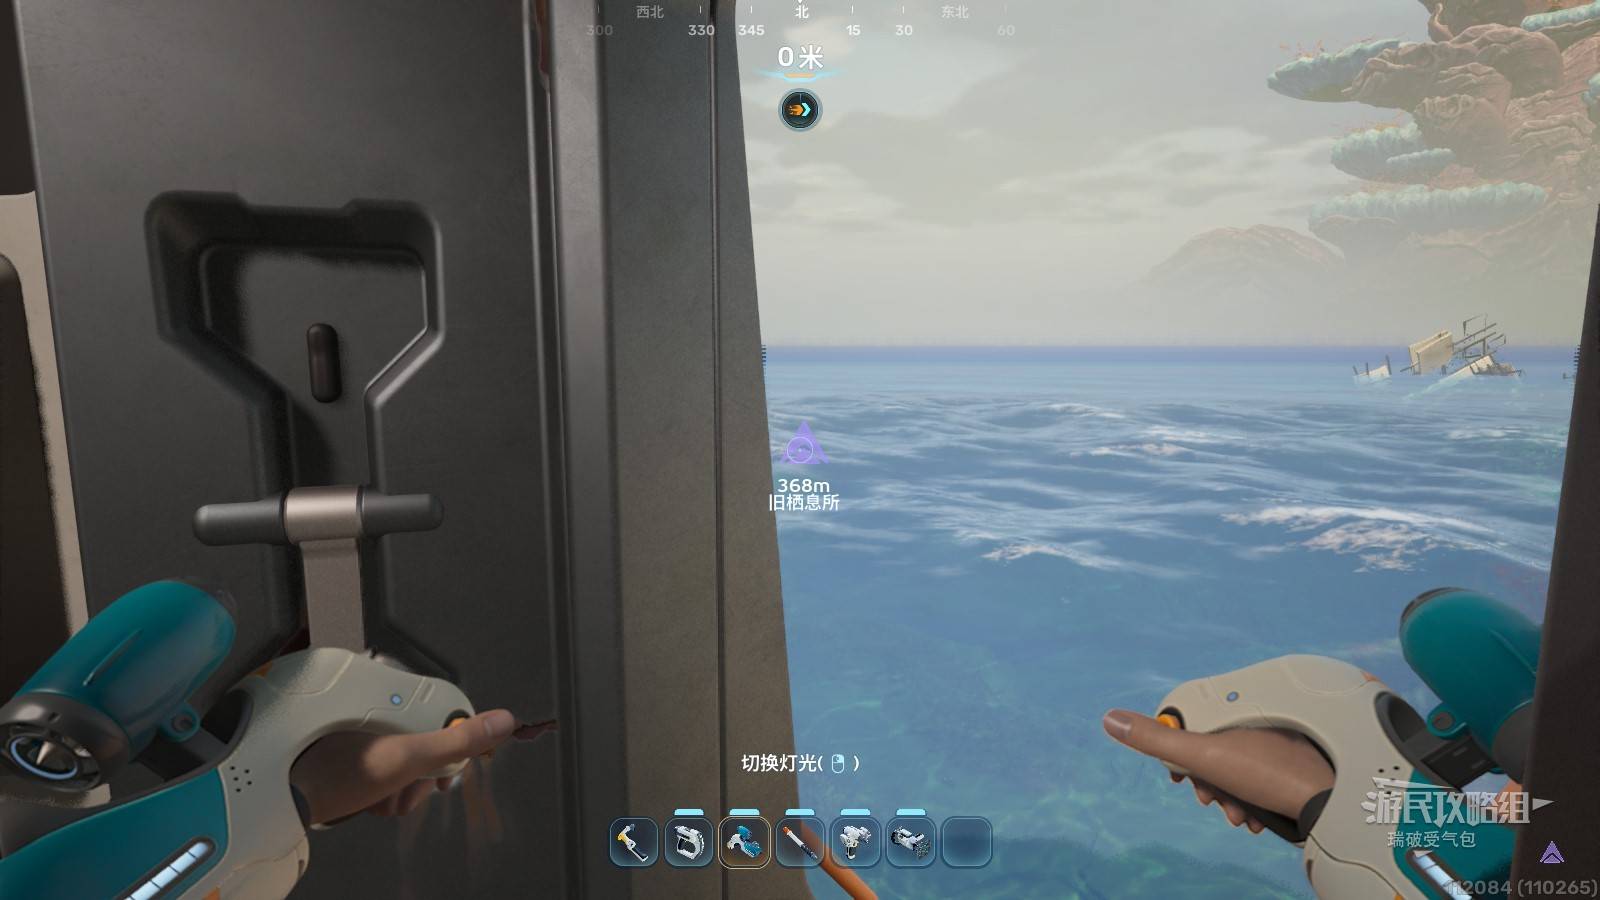
Route: From the lifepod, head NE 45 about 90m to the wreckage. Dive, look NE 30 for the Angel Comb. Stand on its purple sphere, look W 255. Two blue lights — go to the farther one. Watch for toxic sponges. Silver deposits in the caves.
Inside: Use the Bio Bed for agility boost. Scan Repair Tool 1/3. Scan S-shaped shelf. Download data by the bed.
3. Bunker - Sophie’s Seclusion
Route: At the Old Habitat, find the cave beside the “Welcome Home” sign. Follow blue lights. After the second light, go down, turn 180 degrees. Find the hatch.
Inside: Use the Bio Bed for inventory expansion. Download Sophie’s medical records. Scan Swim Ahead Poster. Scan Floor Locker, Single Bed, Flashlight.
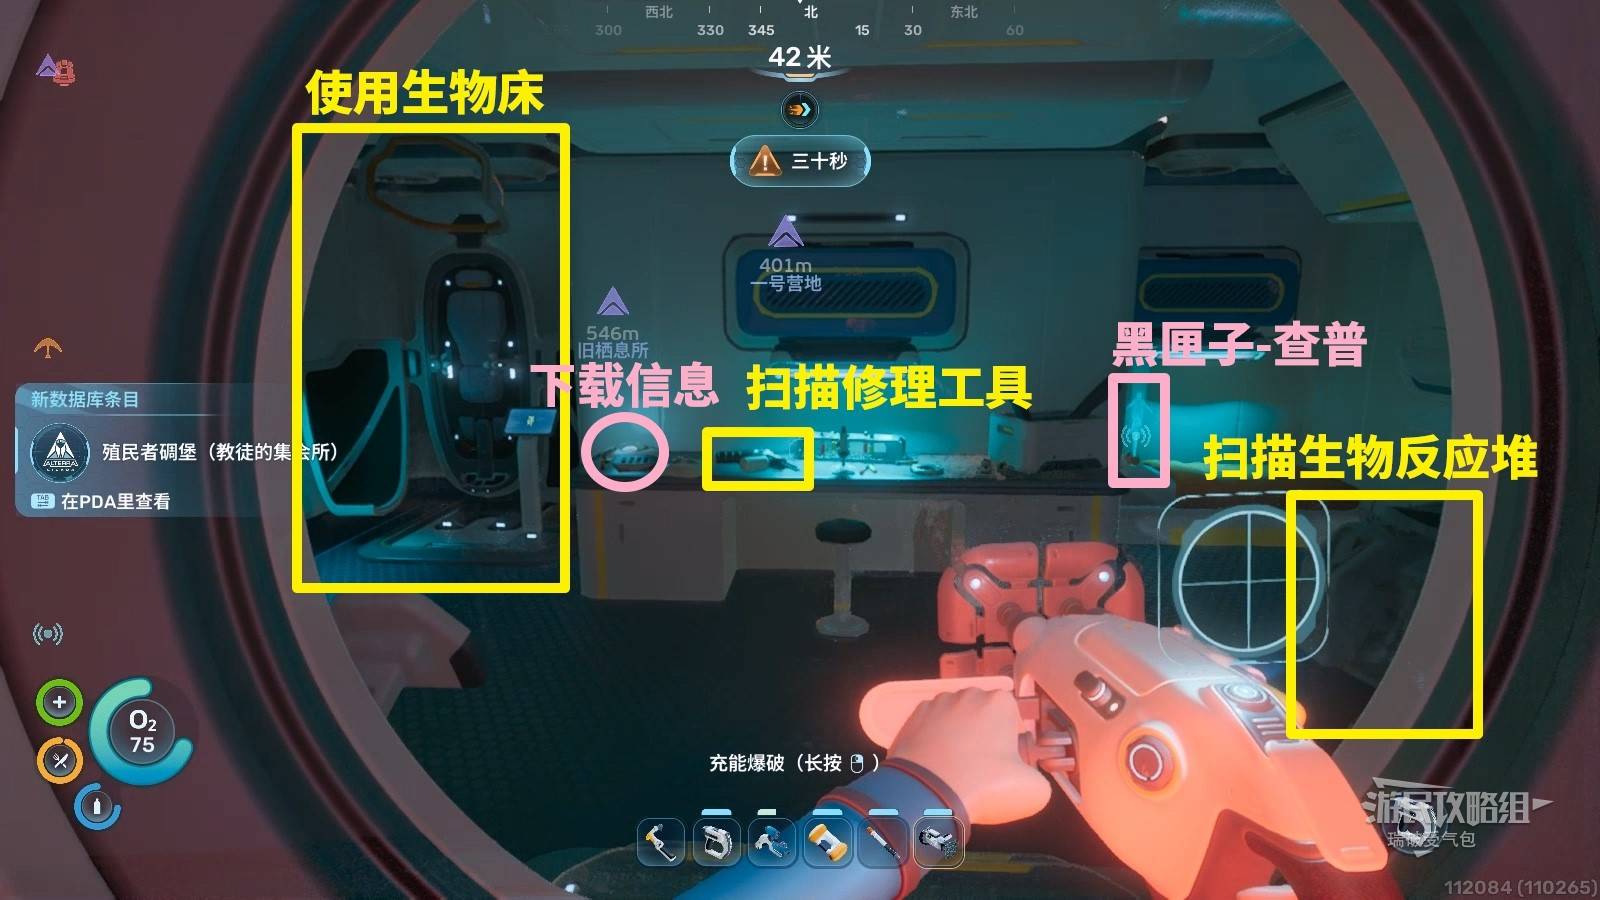
4. Bunker - Cultist Meeting
Route: Get Black Box - Chap signal from NoA. Near the marker, find a stone pillar with blue light — a cave wraps around it. Enter and go to the bottom.
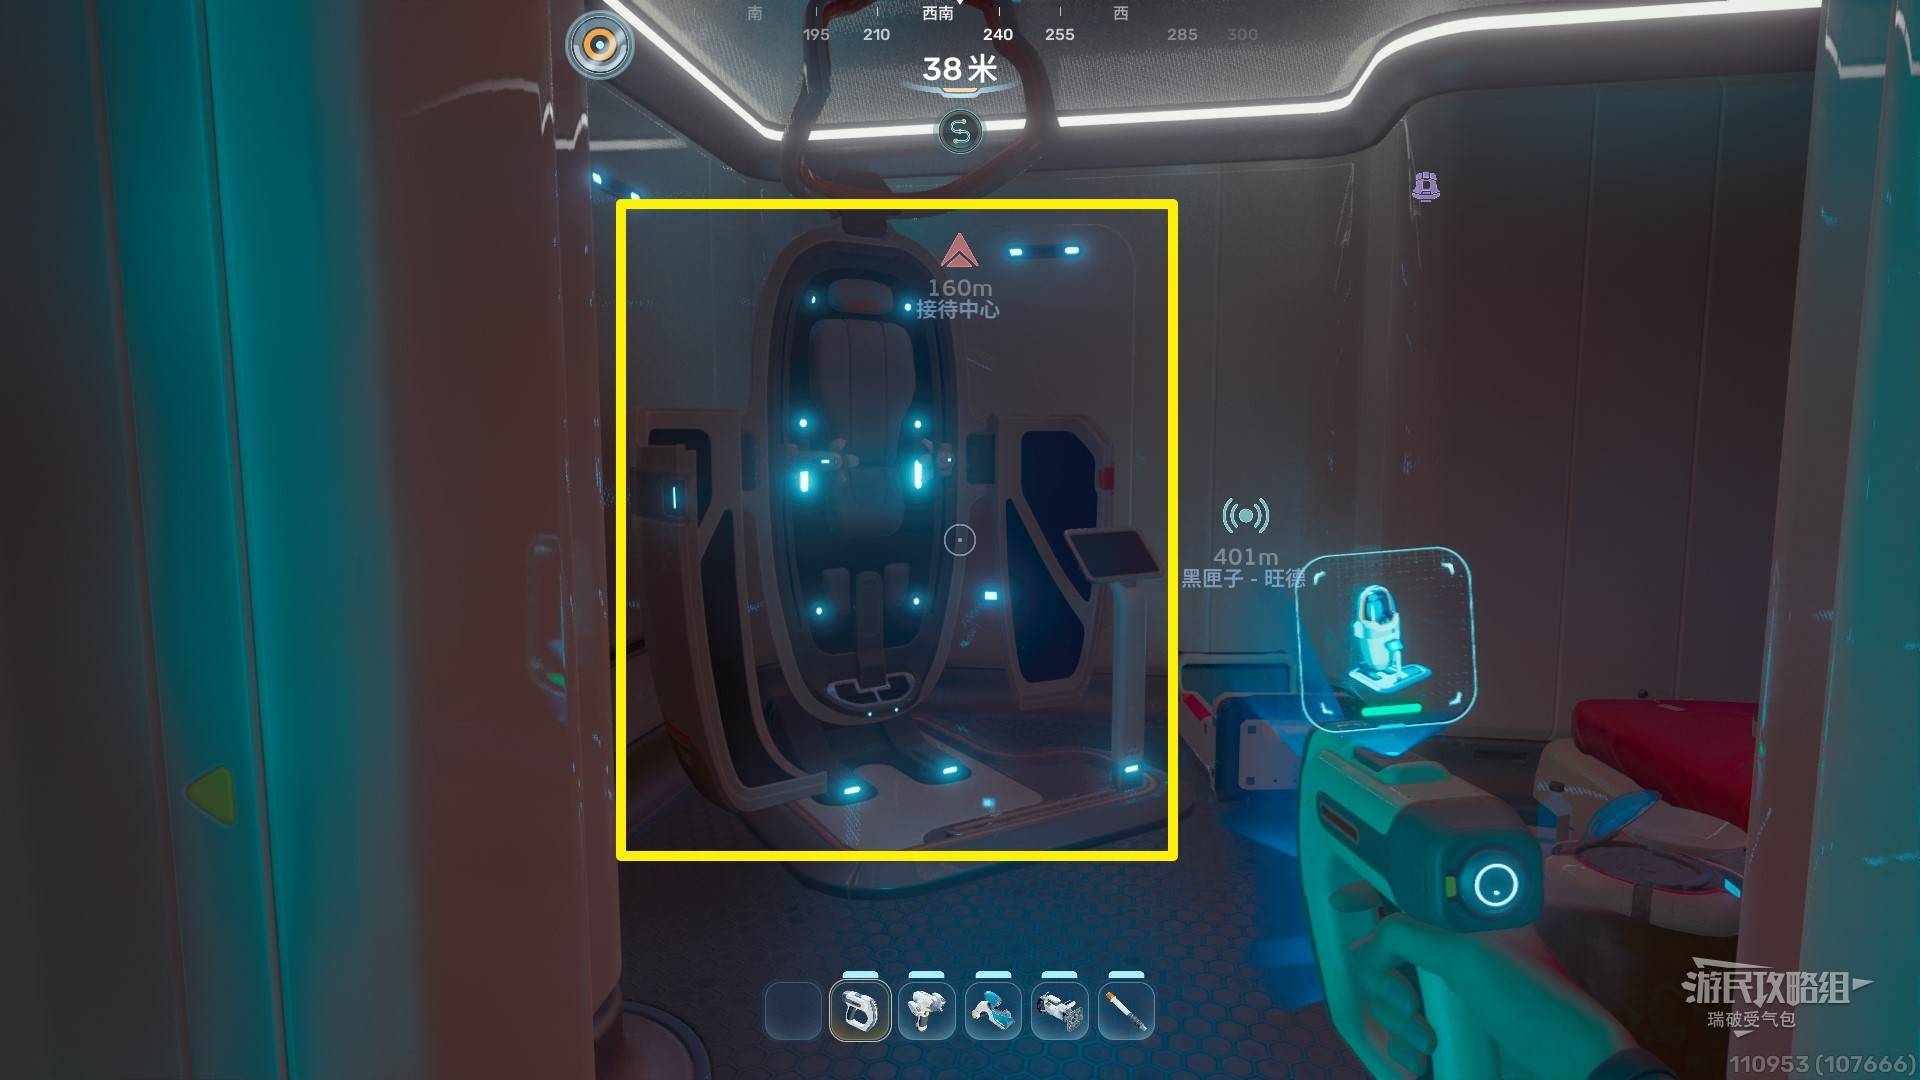
Inside: Use the Bio Bed. Scan Repair Tool 3/3. Pick up Black Box - Chap. Scan Bioreactor 2/3. Pick up Salt.
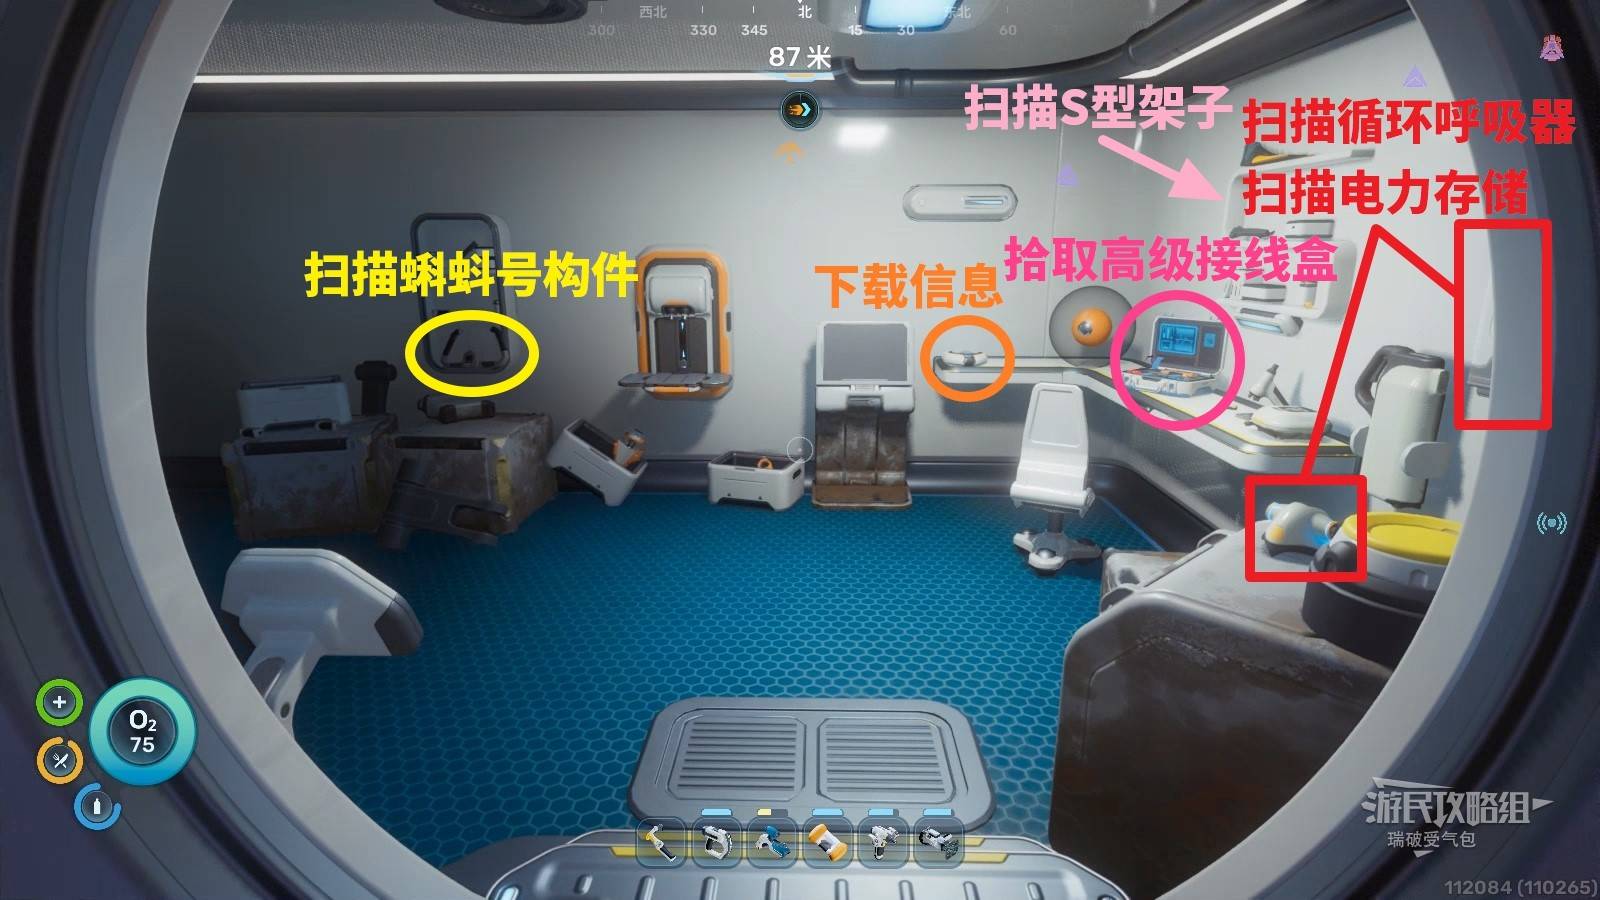
5. Bunker - Unauthorized NOA Modification
Route: Filter for Mingchan Wreck on the Scanner Station. Drive the Tadpole to the marker. Find the hatch on the NW rock wall.
Inside: Scan Power Storage, Rebreather. Pick up Advanced Junction Box. Scan Tadpole Module. Use the Bio Bed.
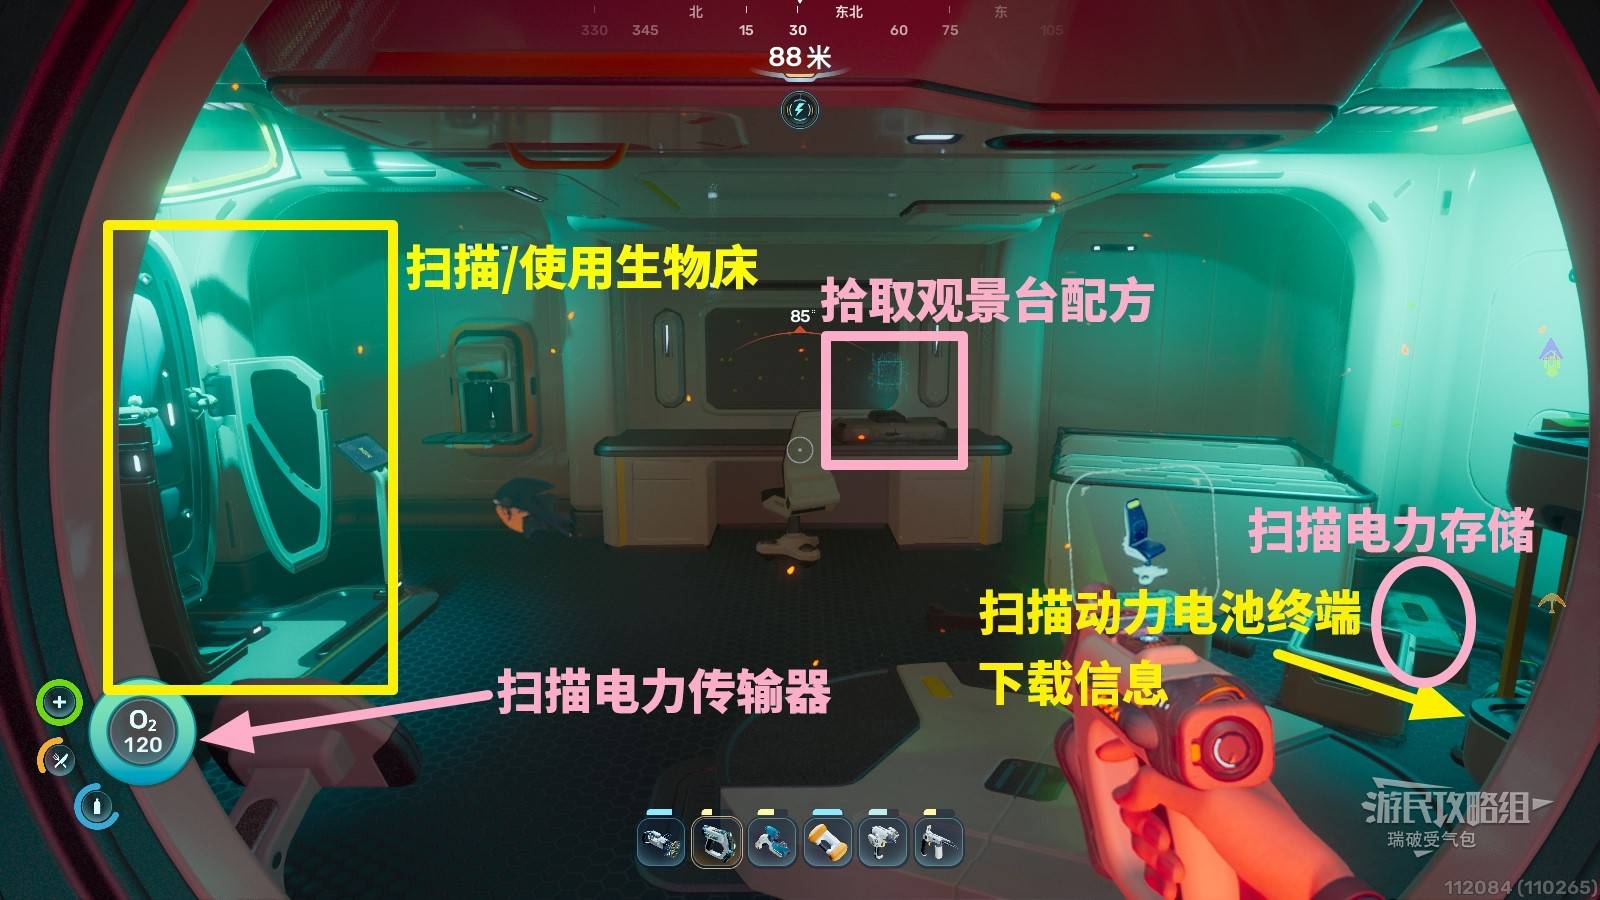
6. Bunker - Nashima’s Lab
Route: From Chap’s signal, look E 120. Travel 150-160m, then look N 25 into the depths to find the high-temperature zone entrance.
Inside: Scan Power Battery Terminal, Power Storage. Pick up Observation Deck Recipe. Use the Bio Bed. Scan Power Transmitter.
Related: For detailed step-by-step walkthroughs, see the Full Story Walkthrough.