5. Old Habitat & Processor
Explore the Old Habitat, scan the Processor, and find many blueprints including the Sonic Resonator.
Preparation
Prepare modules, equipment, food, water, and multiple Decoy Flares (Titanium×1 + Quartz×1). Bring a spare battery for the scanner — swap when low by following the on-screen prompt while holding the scanner.
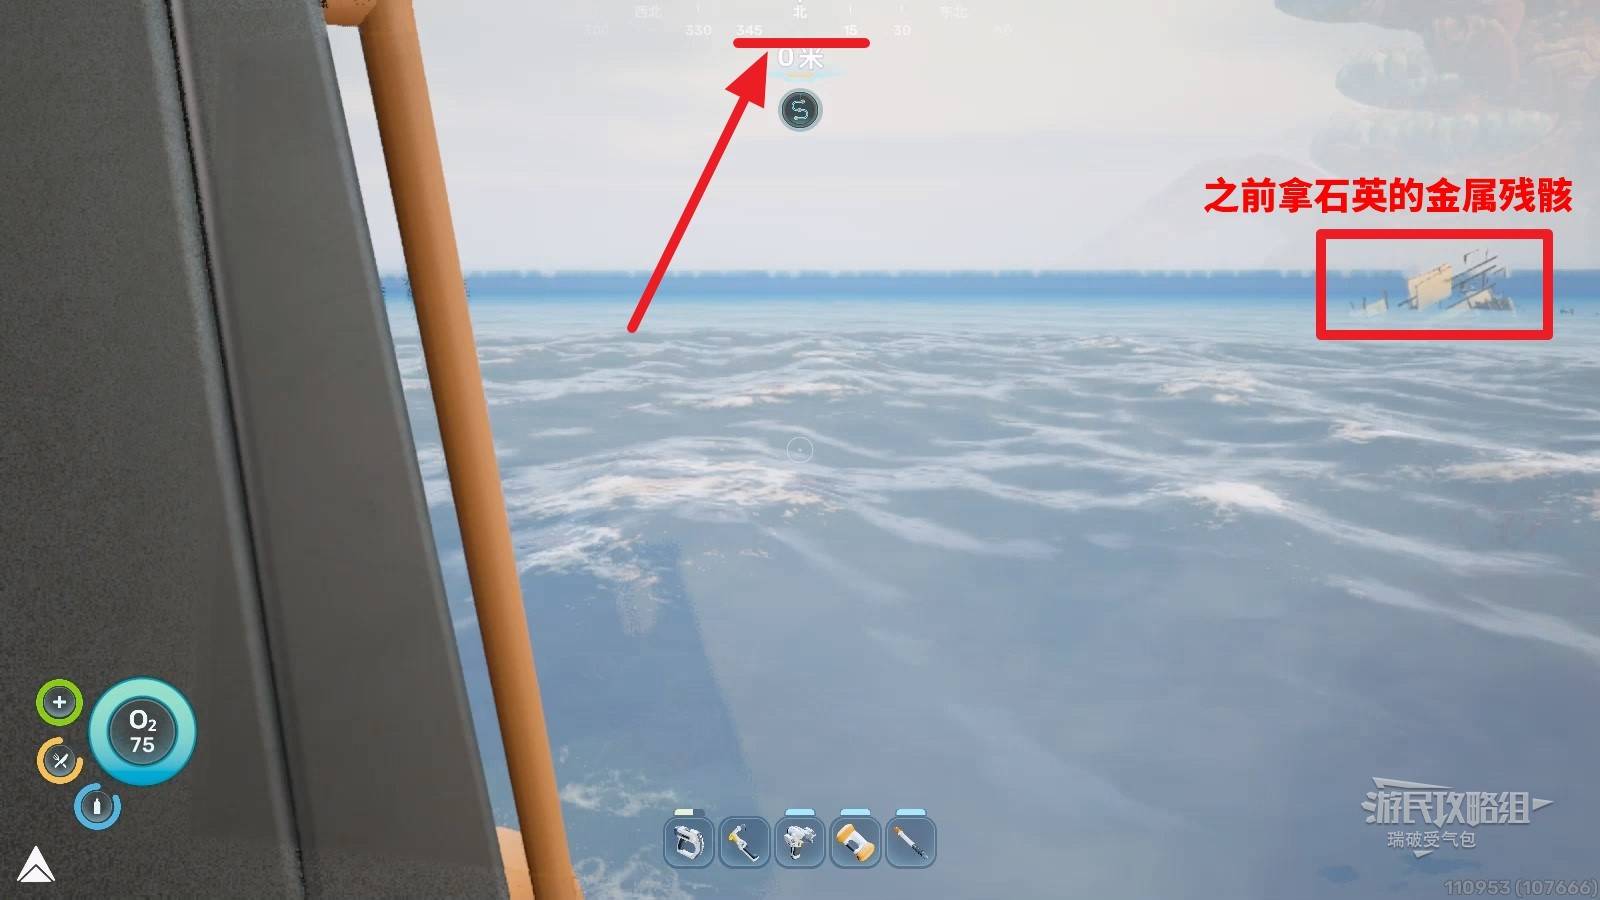
Travel to Old Habitat
From the lifepod door, swim due north on the surface. Dive when nearing the destination.
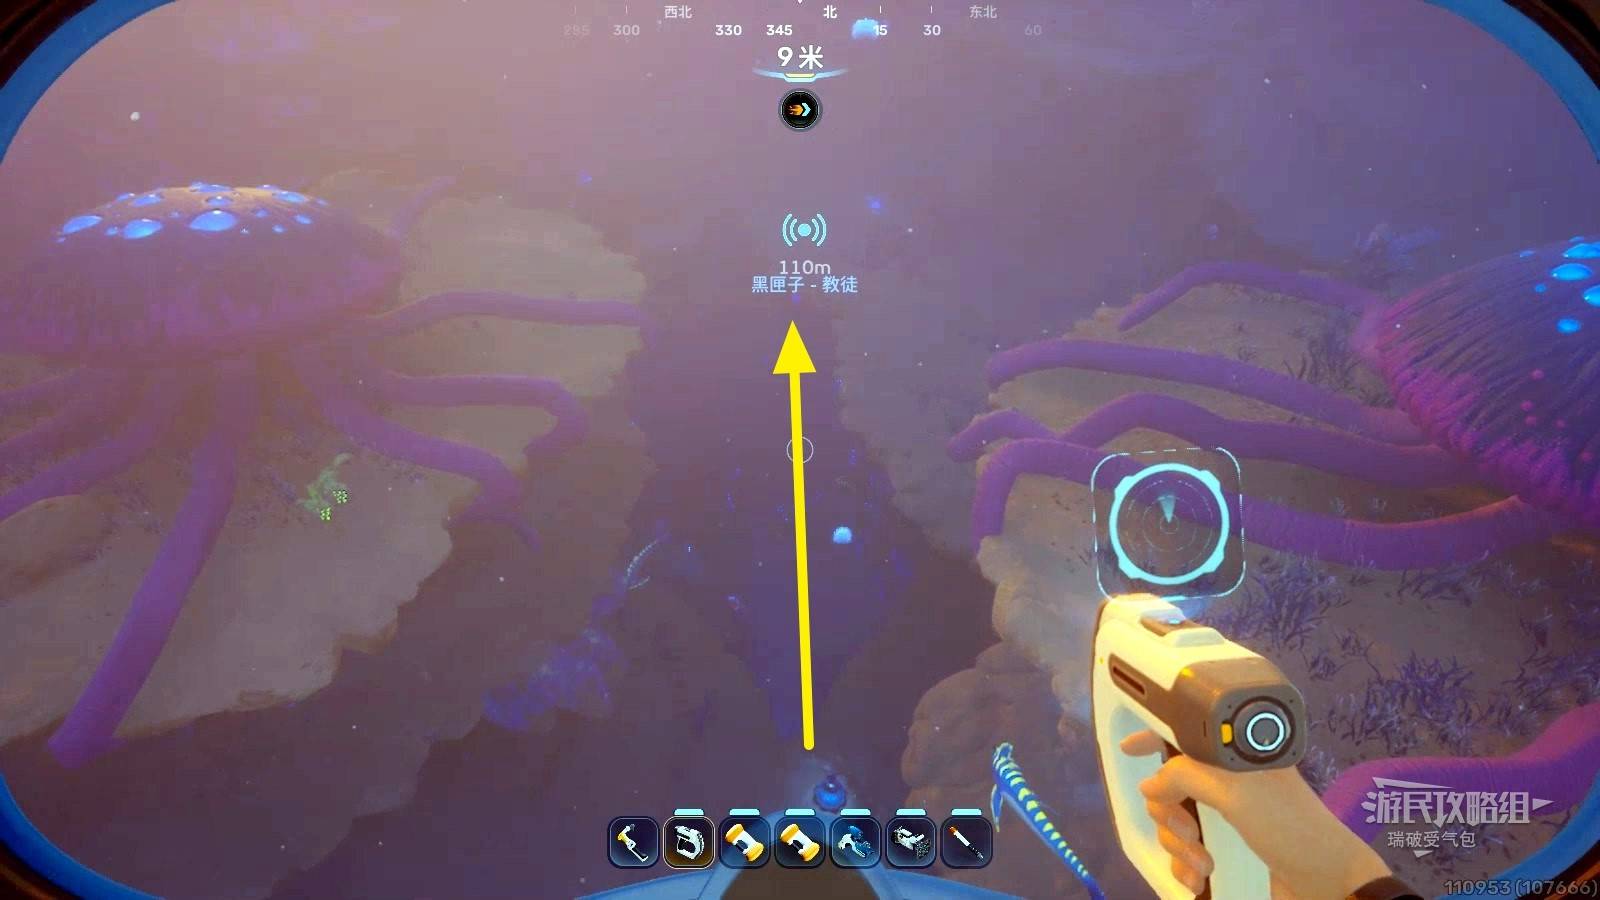
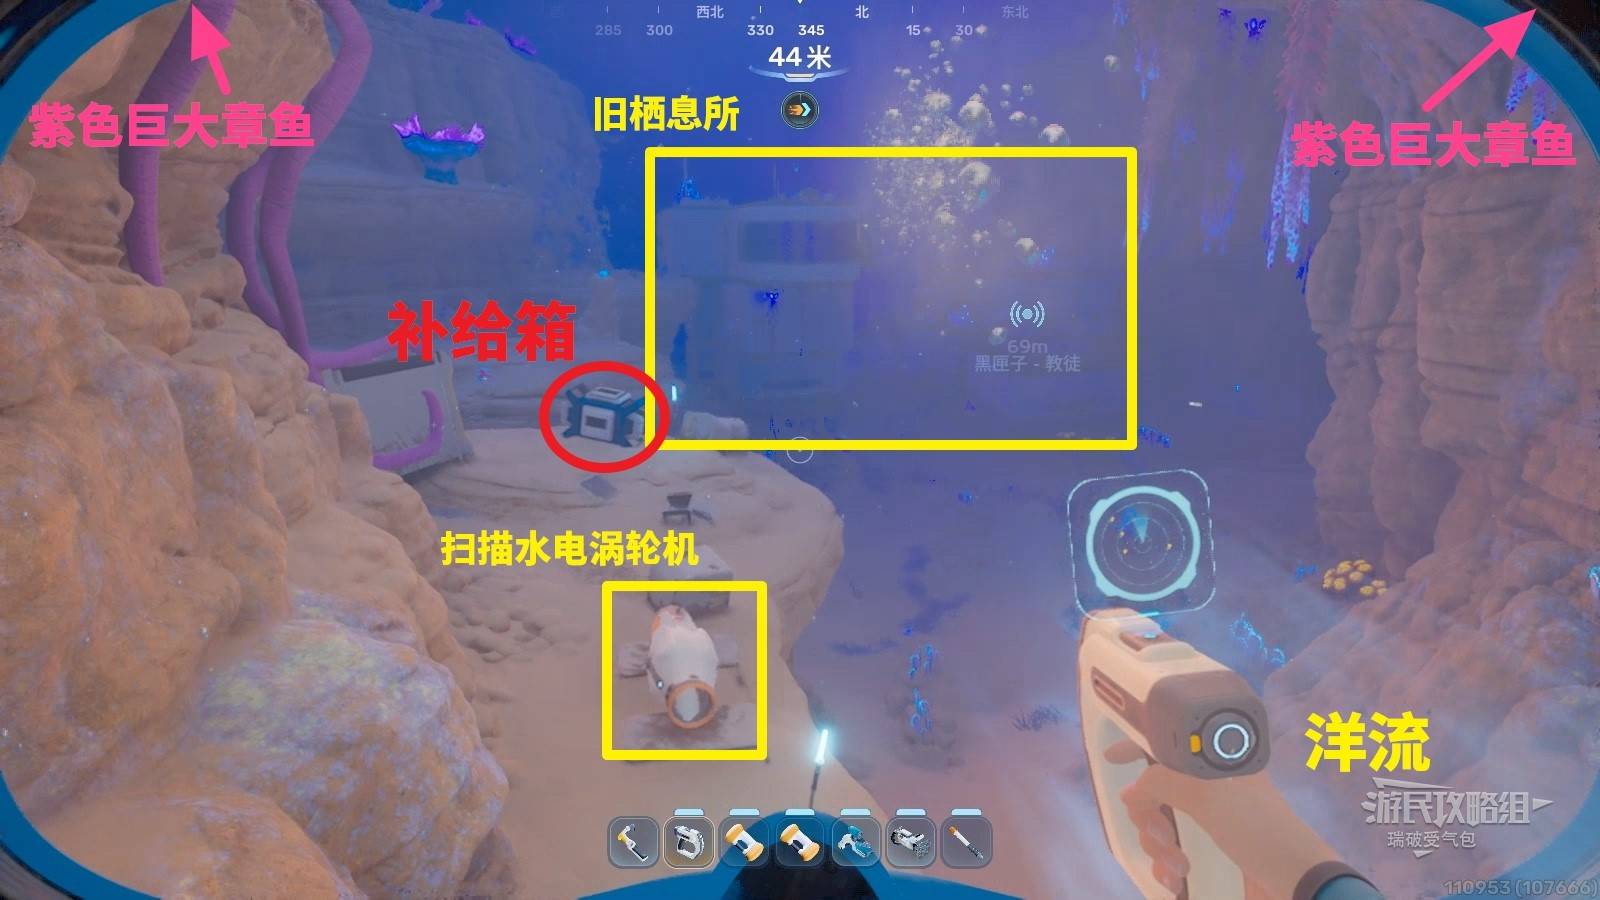
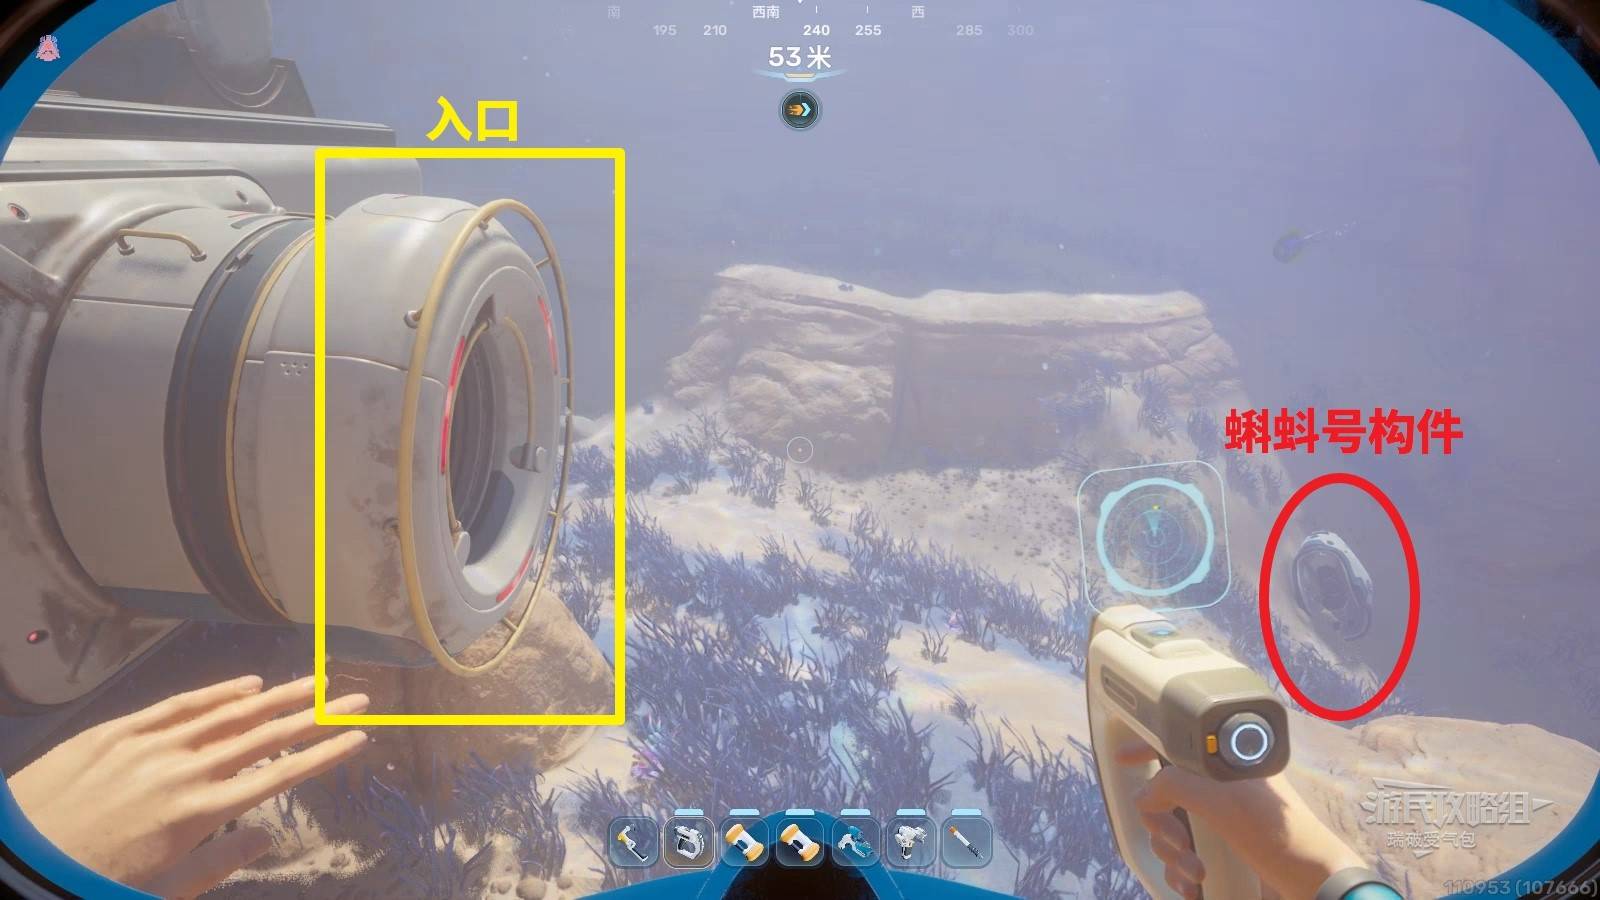
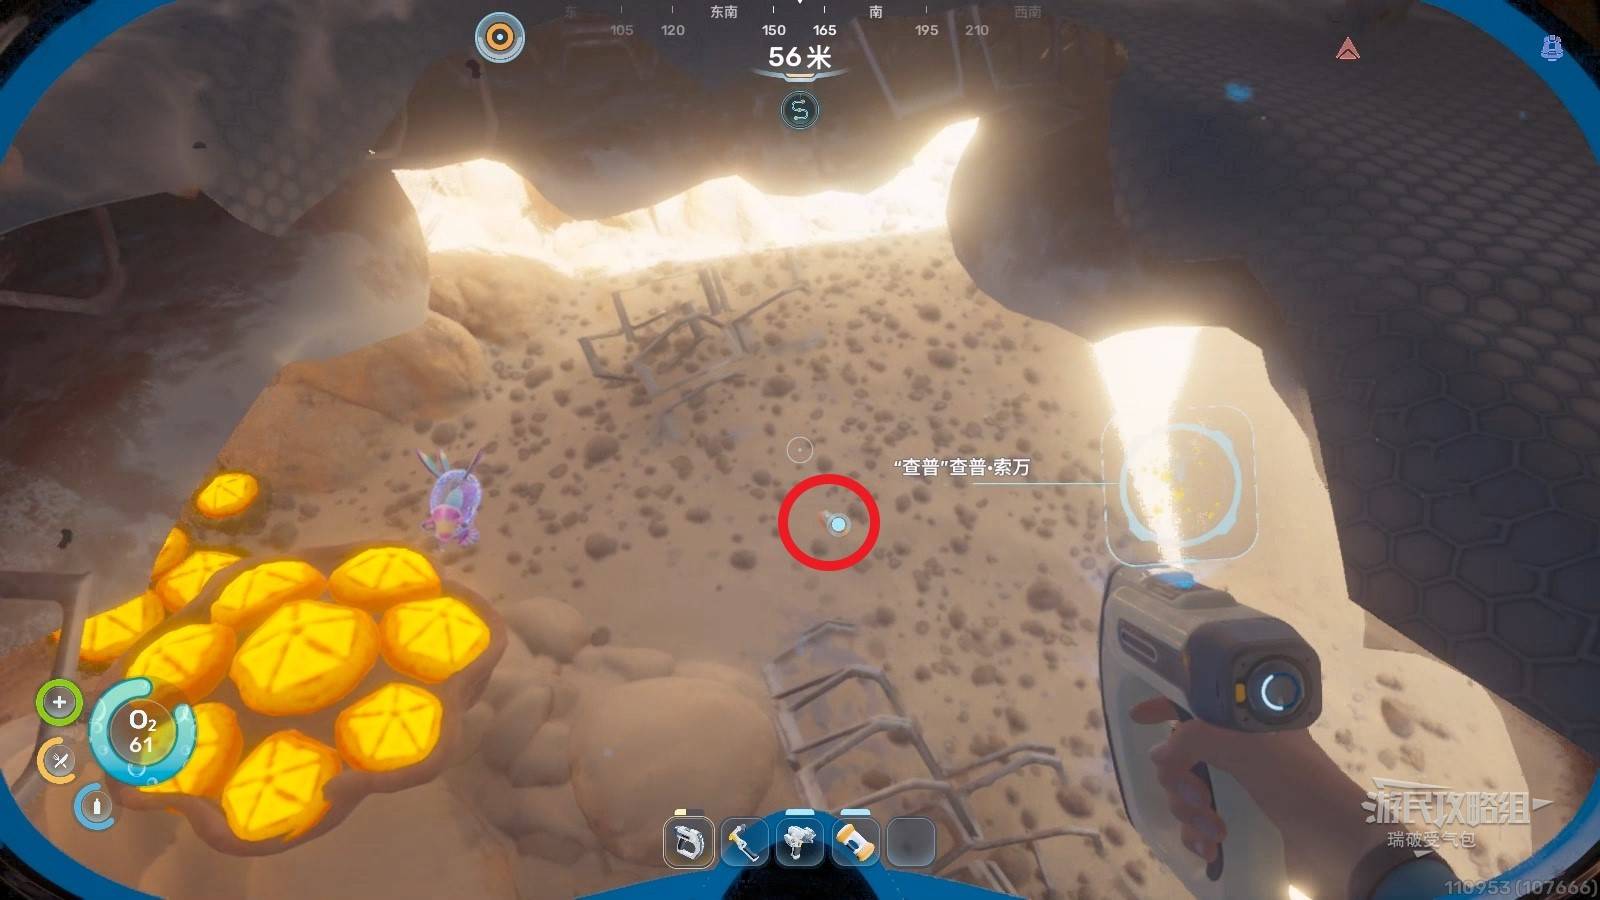
Pass two wrecked compartments on the way (ignore for now, visit on return). About 300m from the lifepod, dive down. Look for two giant purple octopus-like creatures — swim through the gap between them to reach the bottom.
Scan the Hydroelectric Turbine on a platform with blue light and crates. Open supply boxes, then follow the current right to reach the Old Habitat.
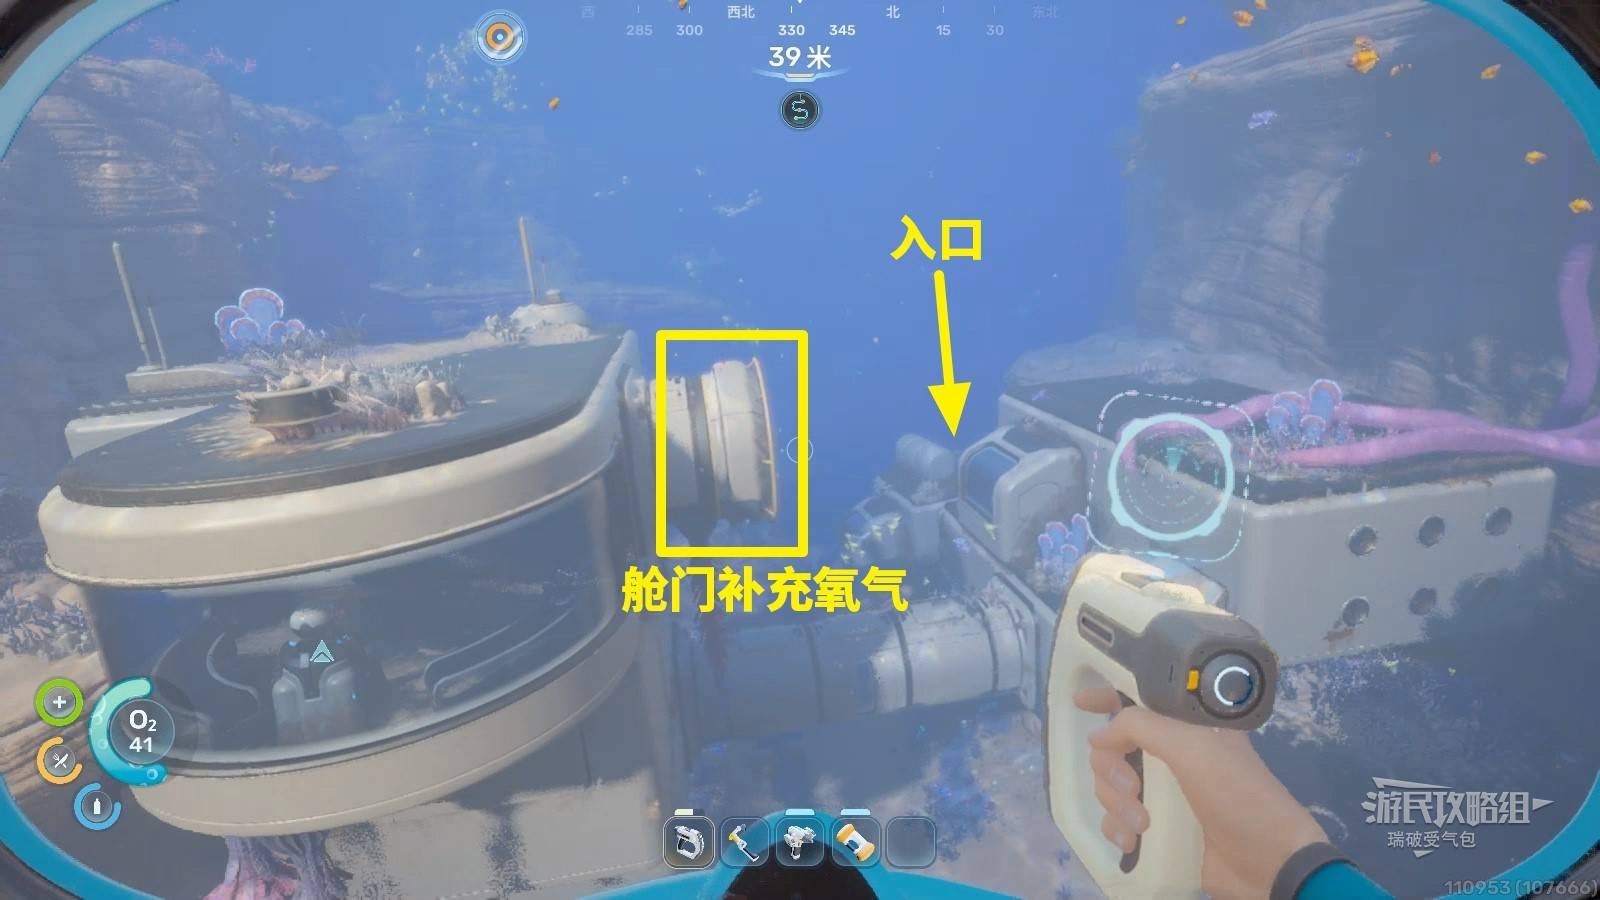
Old Habitat — Exterior
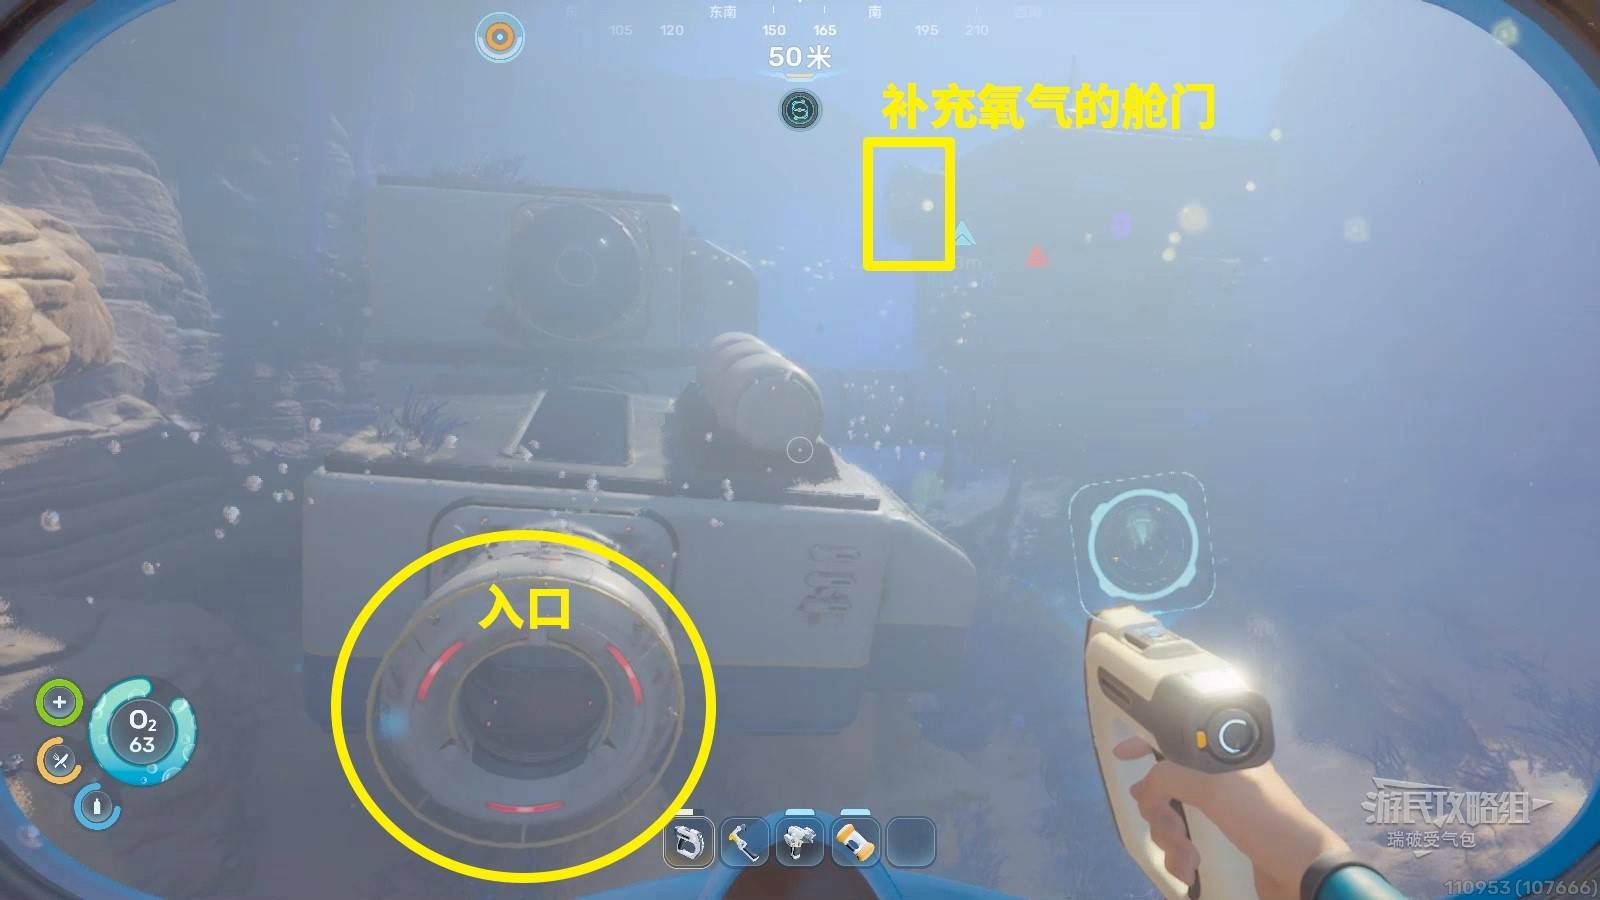
Enter the highest hatch at the front for oxygen, then head toward the main entrance. Looking SW from the entrance, scan Tadpole Module 2/3.
Room 1
Three oxygen refill spots inside. Surface first for oxygen if worried about getting lost.
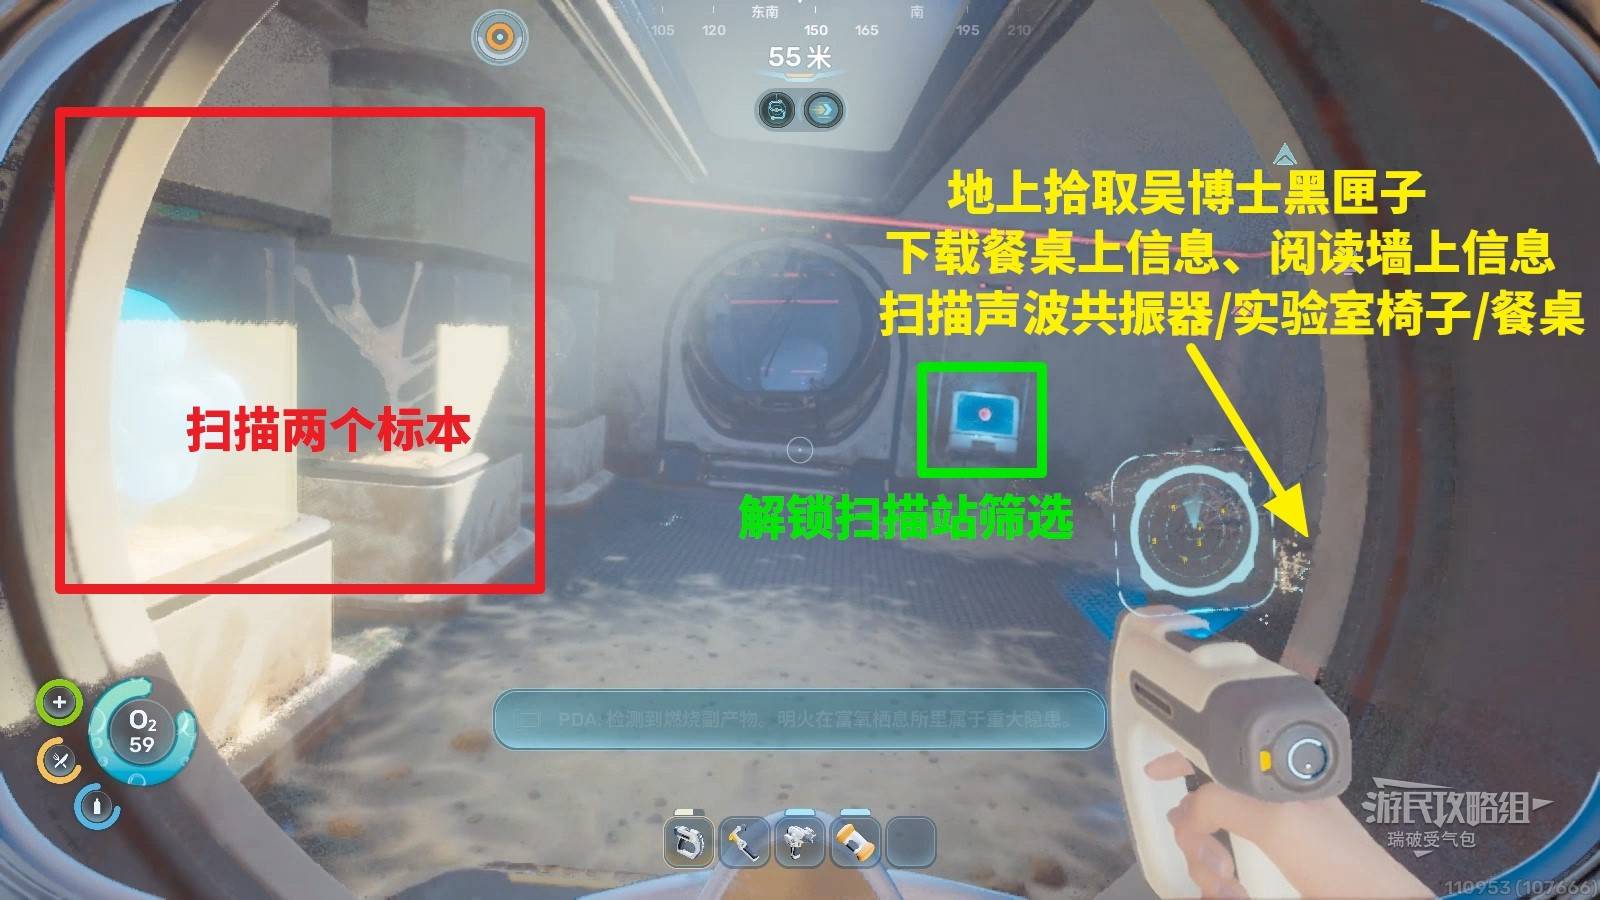
In the first room: scan water-bloom specimens in two display cases on the left. On the right, scan Sonic Resonator 1/2, lab chair, and dining table. Download data from the table. Read the message on the wall near the resonator. Use the panel at the next door to unlock the Bloom Infestation Scanner Filter.
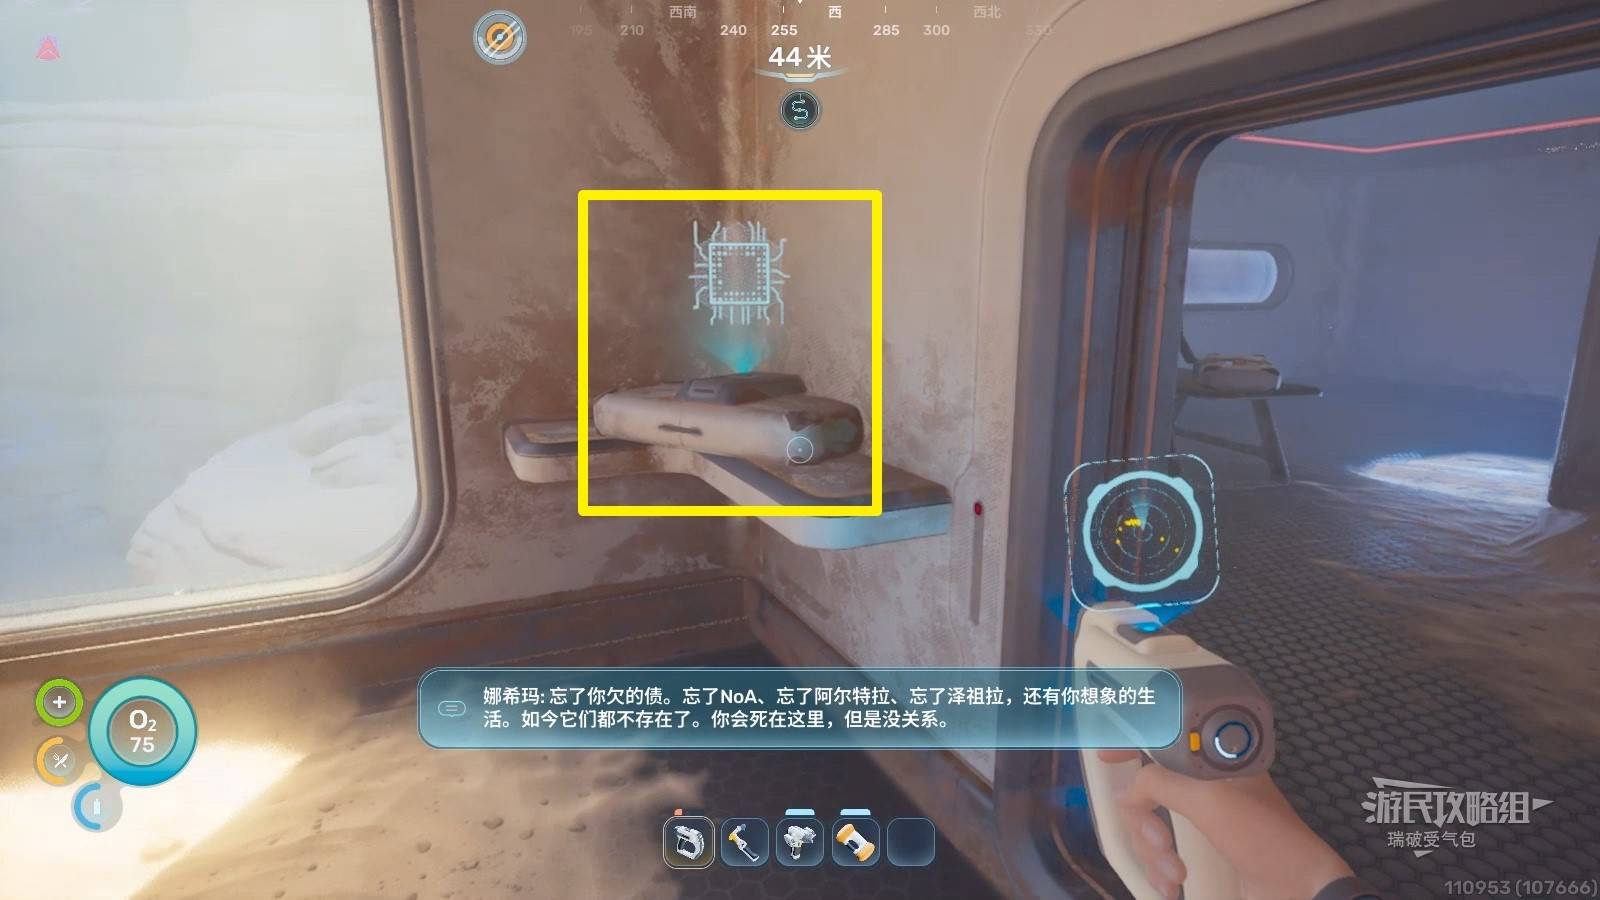
Note: If Dr. Wu’s black box isn’t on the floor or can’t be interacted with, return after viewing all NoA system messages.
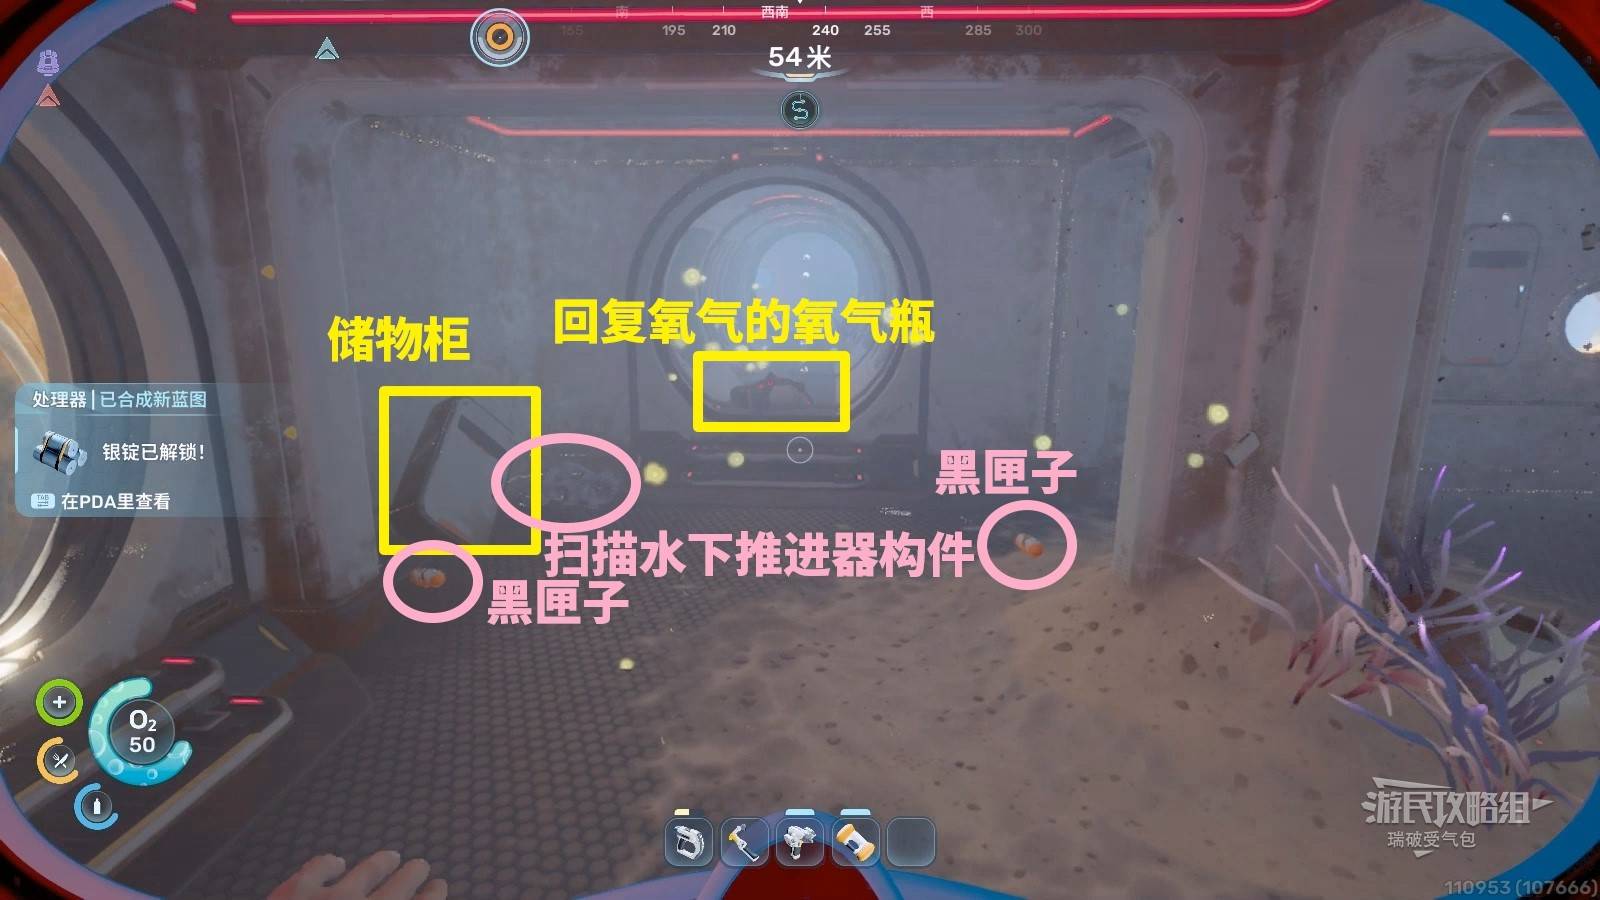
Room 2
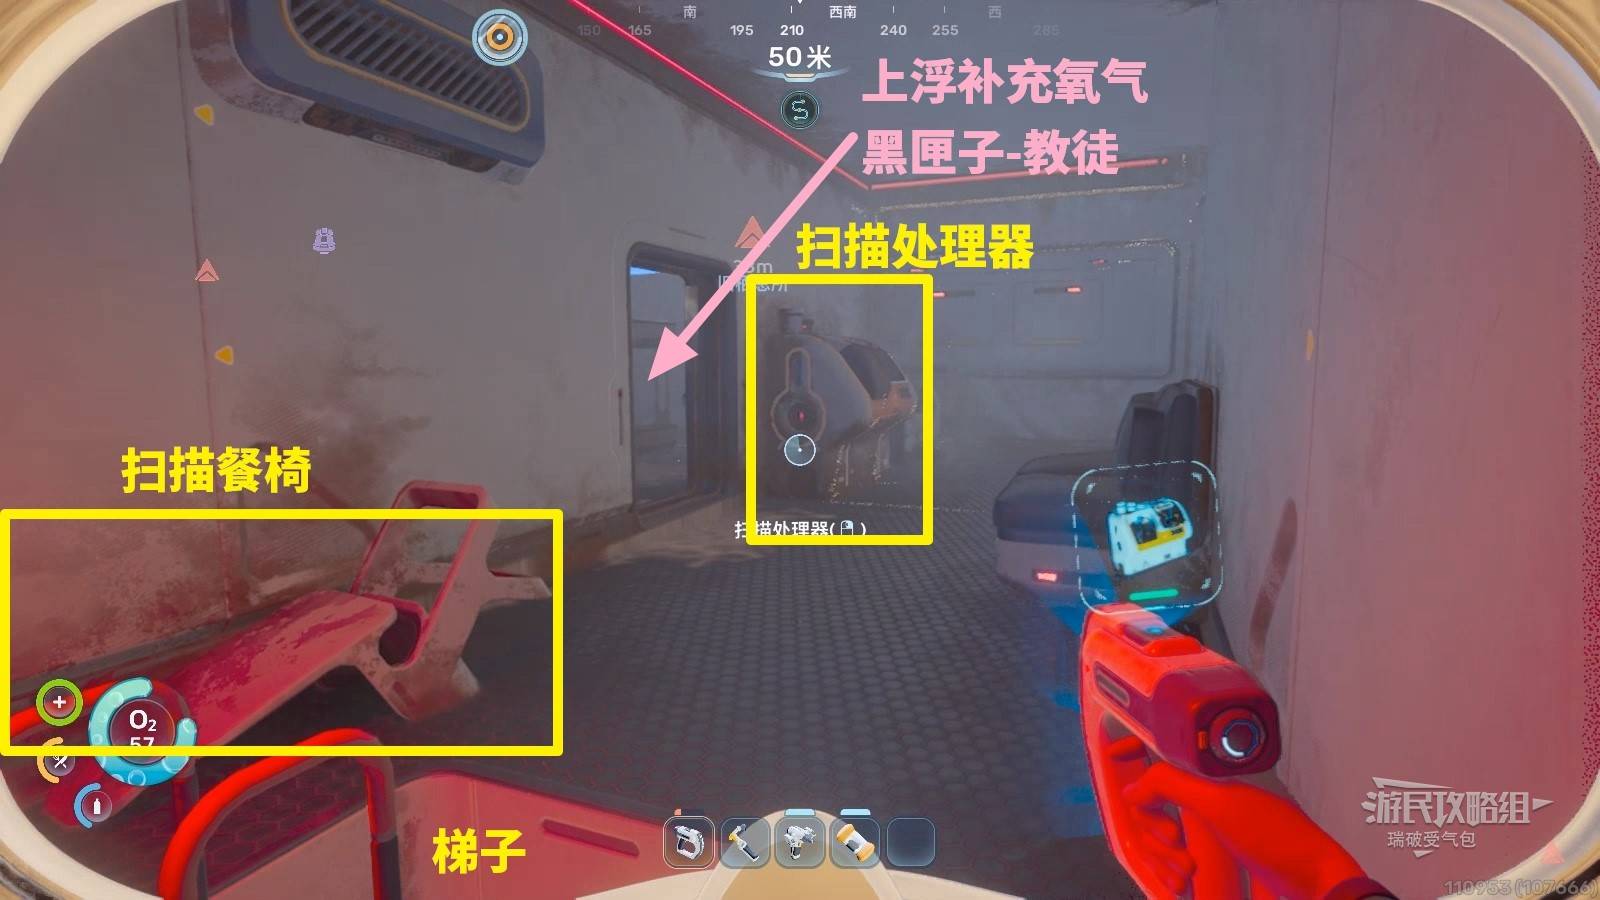
Explore the right half first. In the right-front corridor, there’s a bubbling oxygen tank — stand over it to breathe. Read two black boxes, open a locker, and scan Underwater Propeller Module 3/3 in the corner.
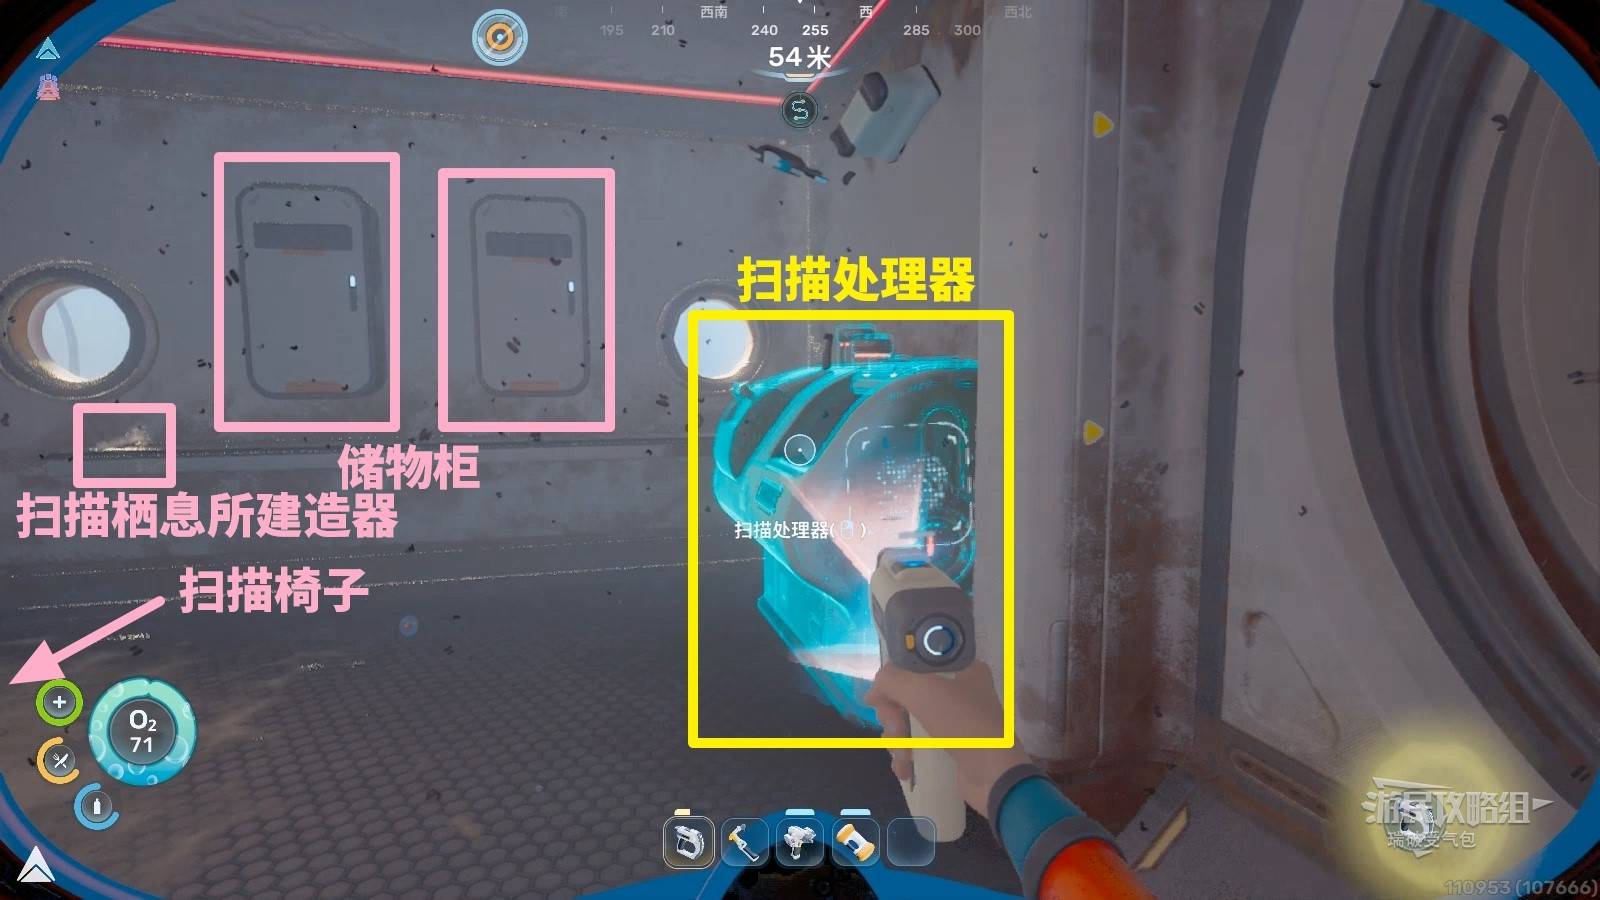
After restoring oxygen, look back toward Room 2’s entrance and scan the Processor. Across from it, scan a fallen chair. Also scan the Habitat Builder on a shelf near two wall lockers.
Room 3
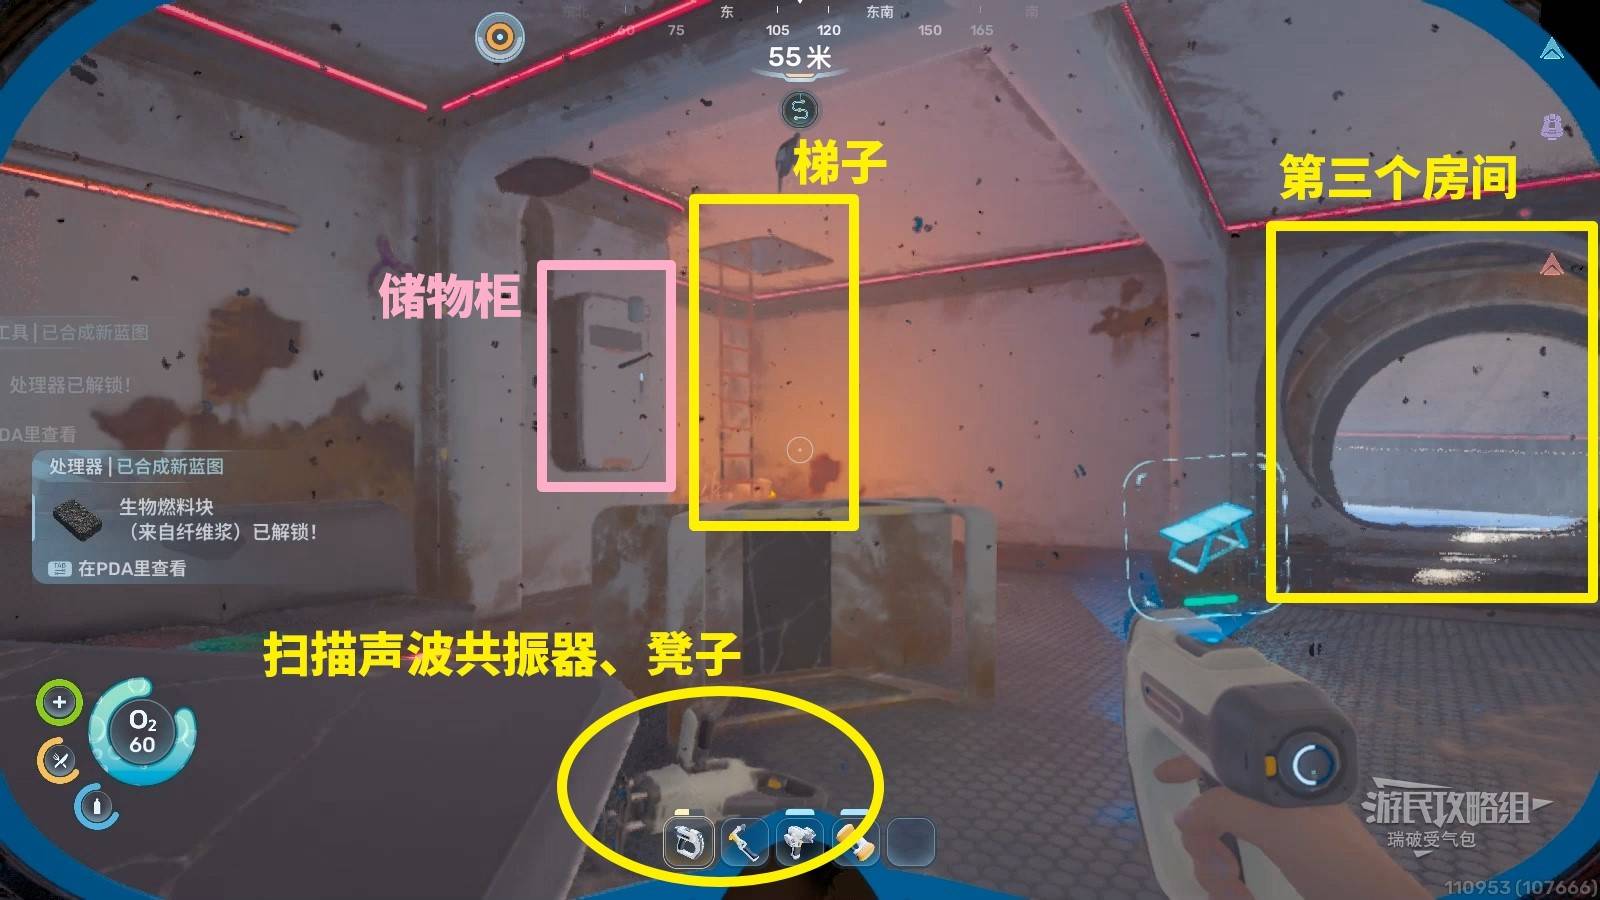
On the left side of Room 2, scan Sonic Resonator 2/2 on the floor by a toppled table (skip if already done), plus a stool. There’s a wall locker. Skip the ladder on the left for now.
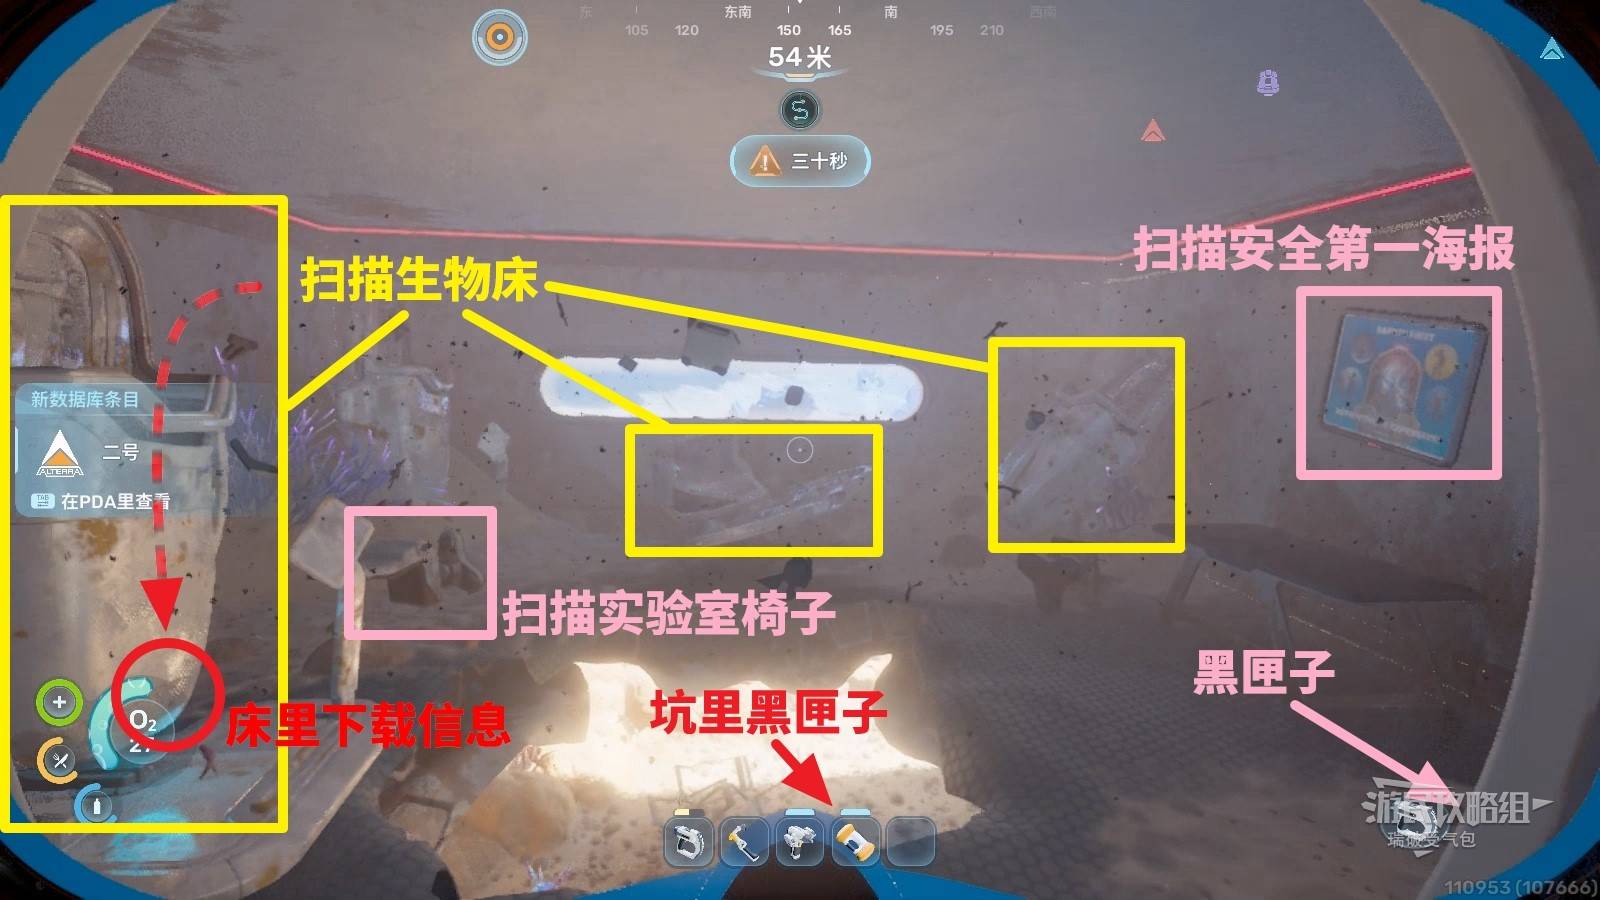
Enter Room 3 straight ahead. Scan three biological beds — one on the left has a data download. Also scan the lab chair. On the right wall, scan the Safety First Poster. In the right corner on coral rubble, find a Mantis black box. Through a hole in the floor, find a Chap black box below.
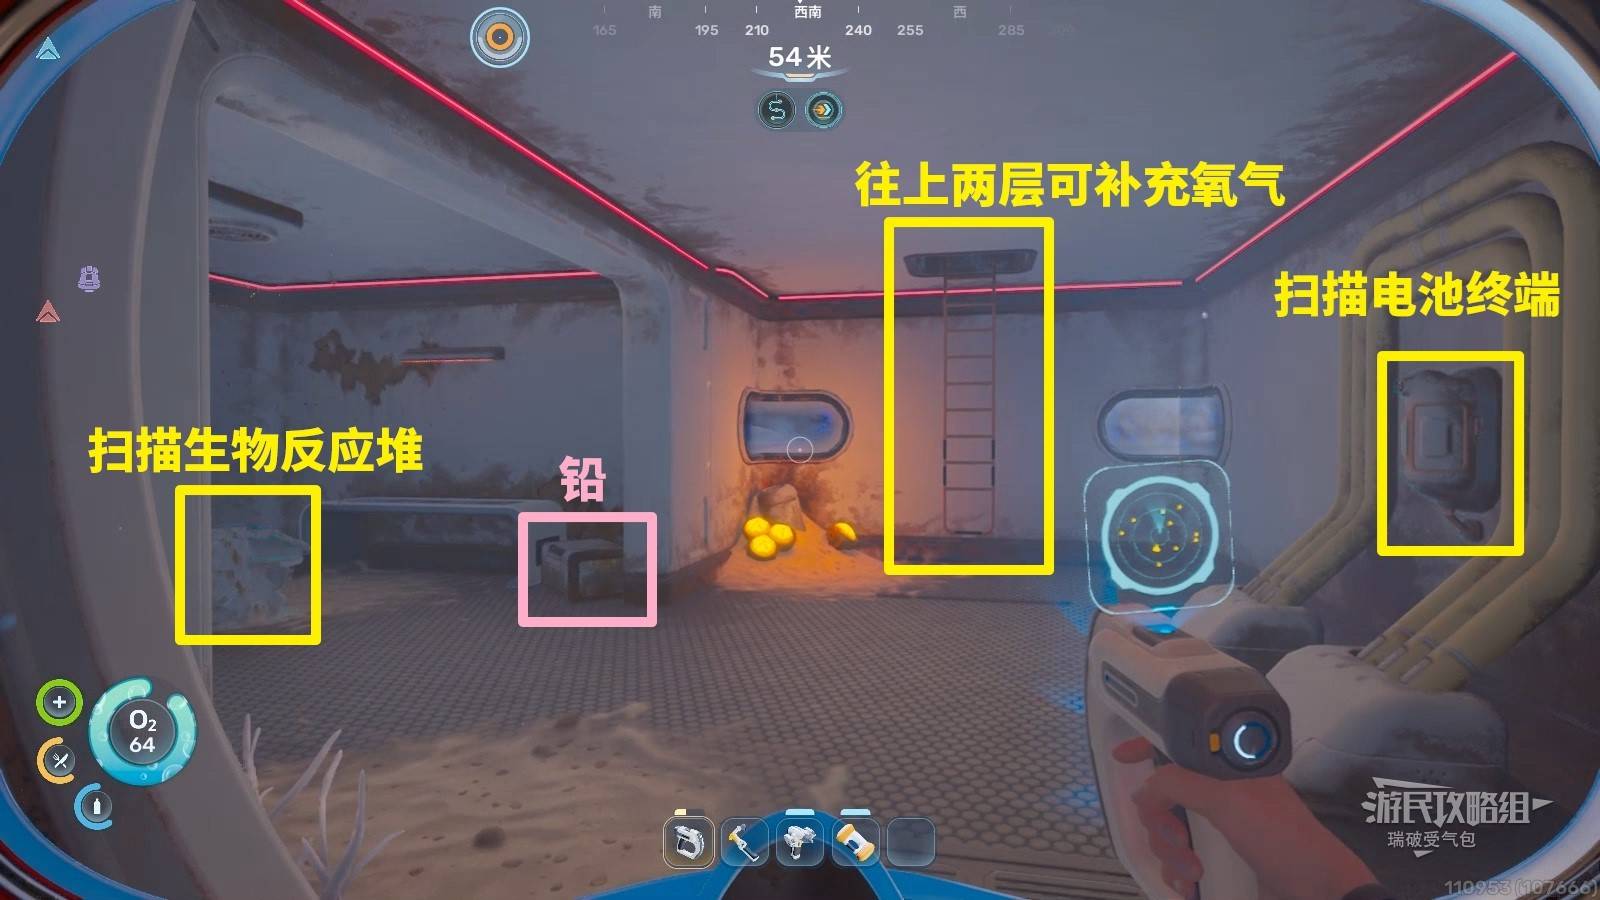
Battery Terminal & Bioreactor Area
Back in Room 2, take the corridor past the oxygen tank. In the end room: scan Battery Terminal 1/2 on the right wall (base battery terminals recharge batteries). Climb the ladder nearby two levels for oxygen. On the left, scan Bioreactor 1/3. Open a storage box under a table for Lead.
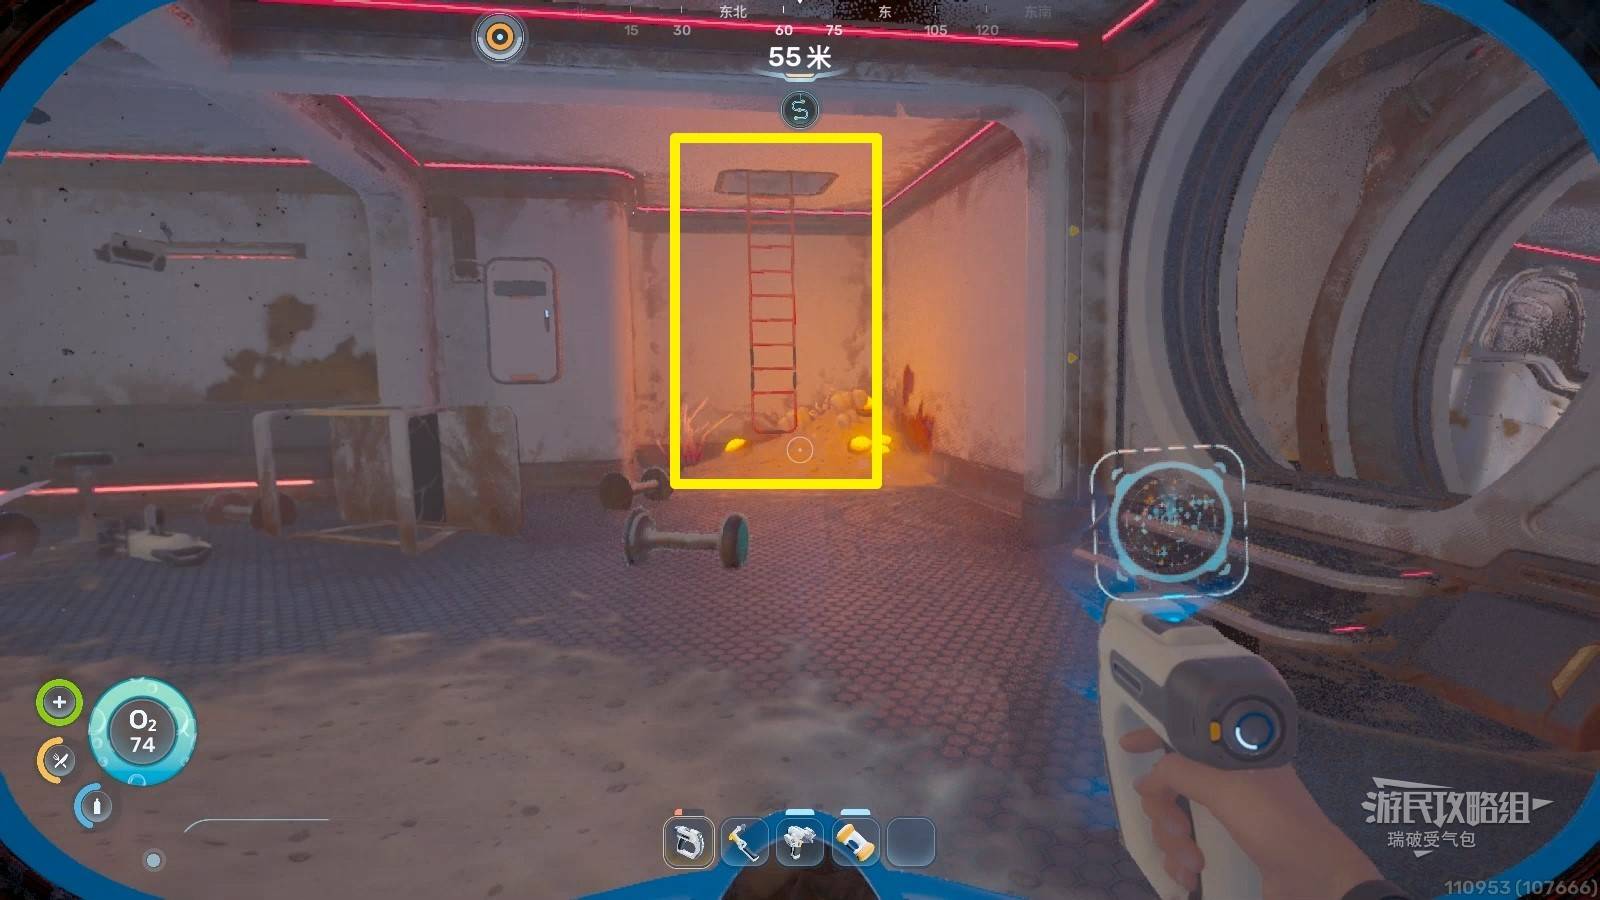
Upper Floors via Ladder
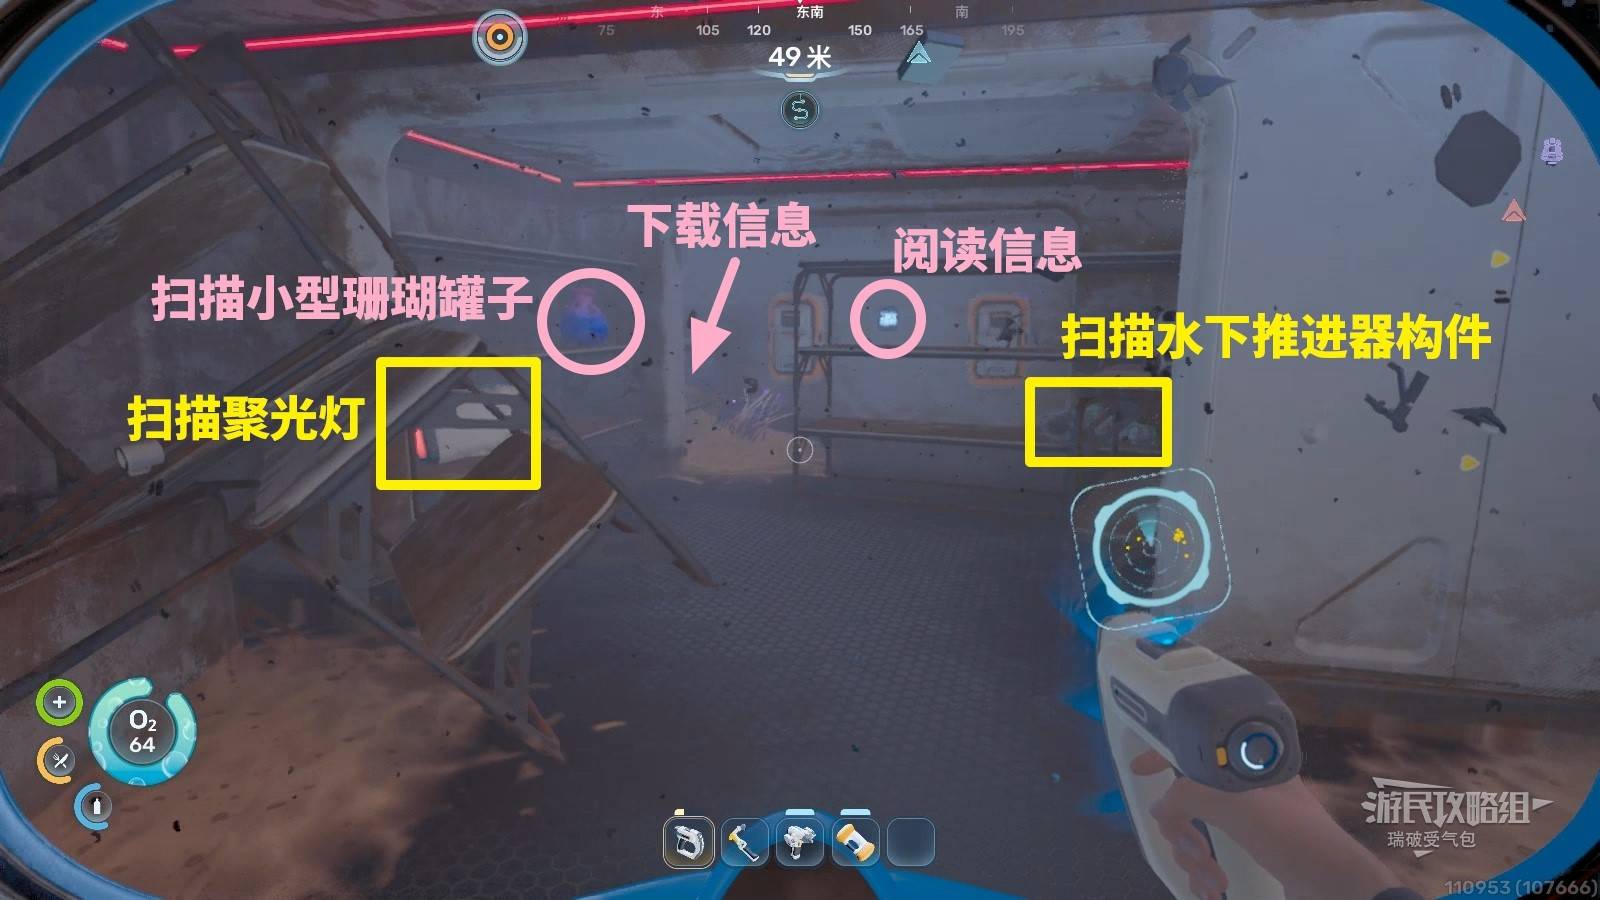
Climb one ladder level (not the oxygen level). On the left shelf, scan Spotlight and Small Coral Jar. On the right shelf, scan the Underwater Propeller Module. At the room’s far left, download Ganzhuo’s data and read wall messages.
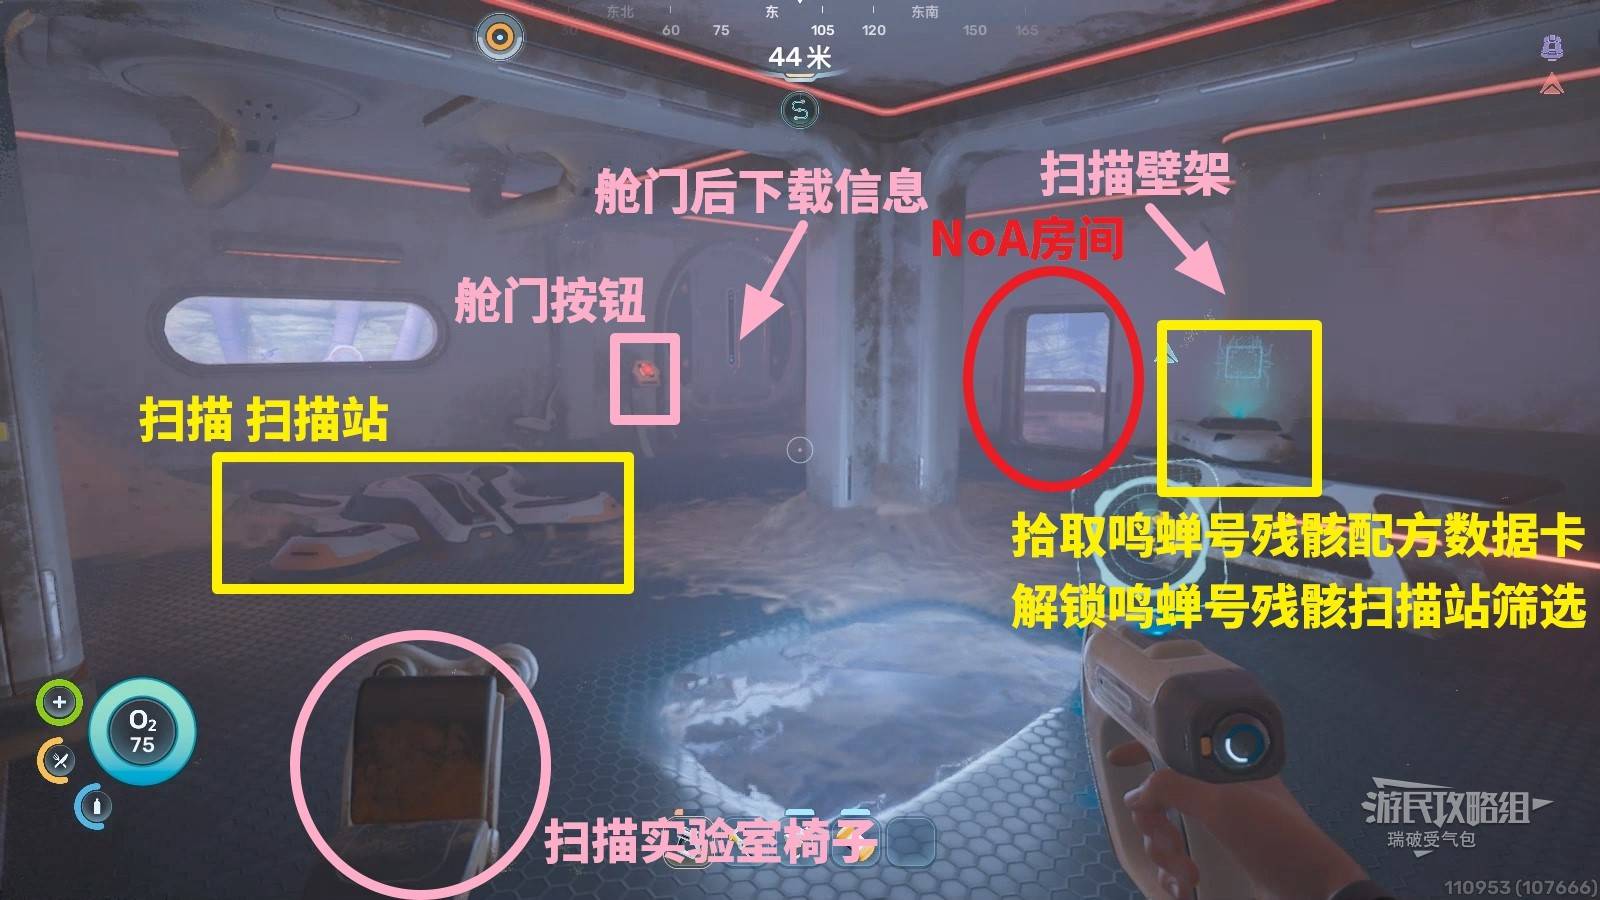
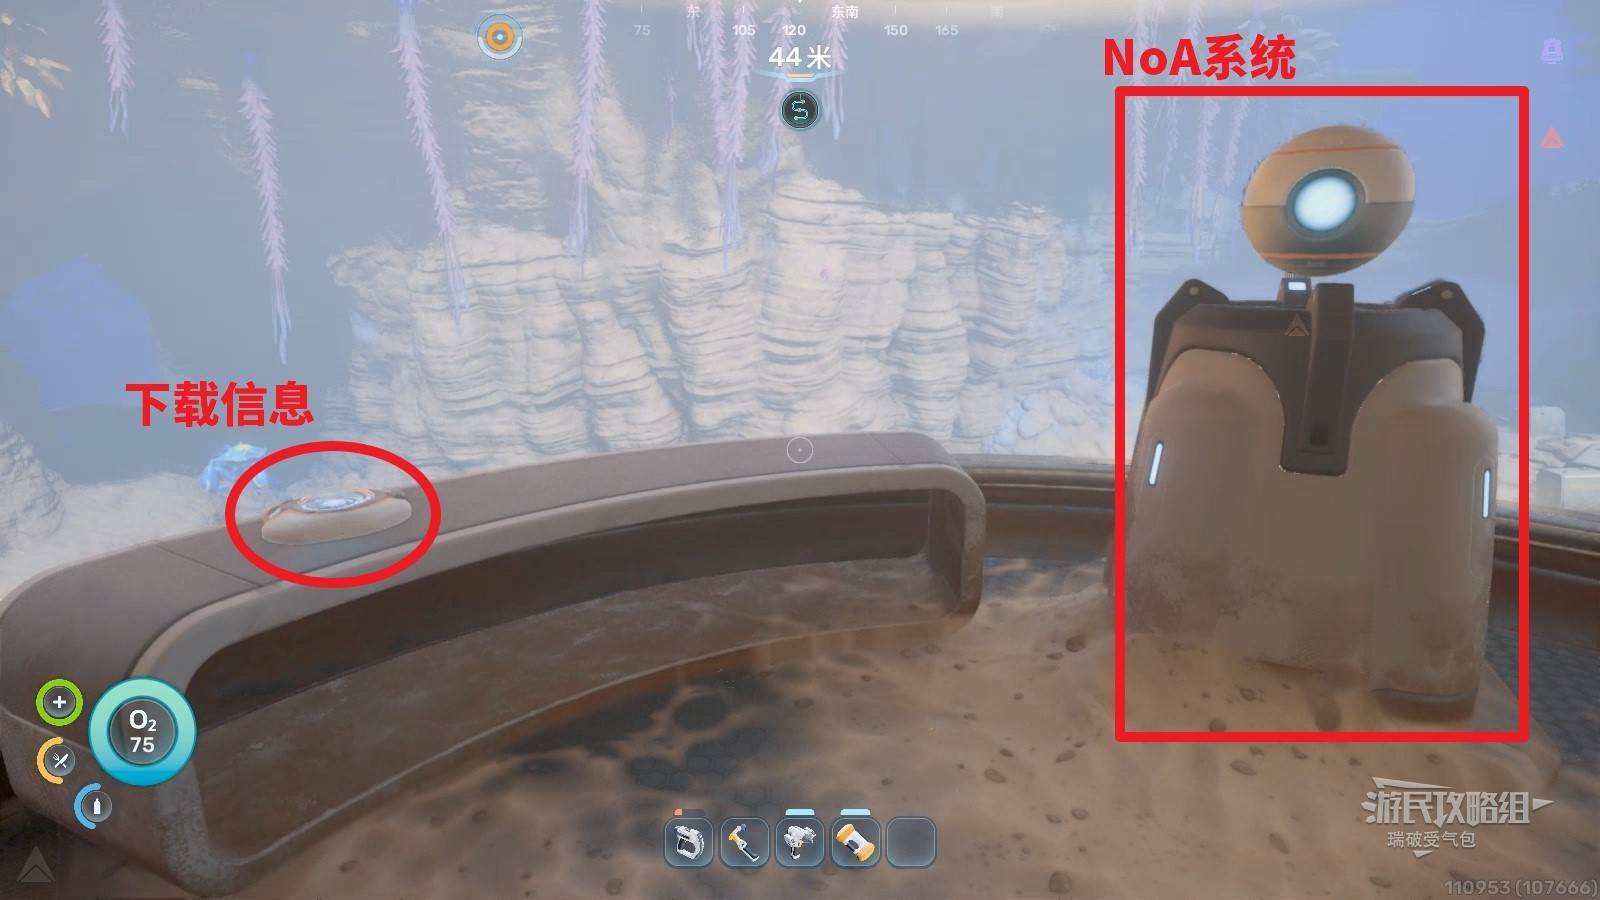
Go up one more level through the ceiling hole to reach the oxygen level. Scan the Scanner Station in the corner. Press the red button to open the hatch (used earlier for oxygen). Behind it, download Nashima’s data. On the other side, interact with the projection to pick up the Mingchan Wreck Recipe Data Card, unlocking the Mingchan Wreck Scanner Filter. Scan the Shelf on the wall. Then enter the NoA system room through the other door.
NoA System Room
Pick up the Room Recipe Data Card by the right wall to unlock ladder construction. Download data from the bench to NoA’s left. Then view all NoA system information.